

How Do I Allow a Variable Display in Two Lines in Template Design?
When using variables such as Certificate Printed Name, long values (e.g., full participant names) may not fit properly in a single line.
By enabling the “Allow 2 Lines” feature, the system will automatically move excess text to a second line based on a defined character limit.
Steps to Allow 2 Lines for a Variable
- In the Template Design canvas, locate your variable (e.g., Certificate Printed Name).
- Click the variable text box to highlight/select it.
- On the right panel (Content and Style), scroll to the Format section.
- Under Format Setting, set:
- Allow 2 Lines = Yes
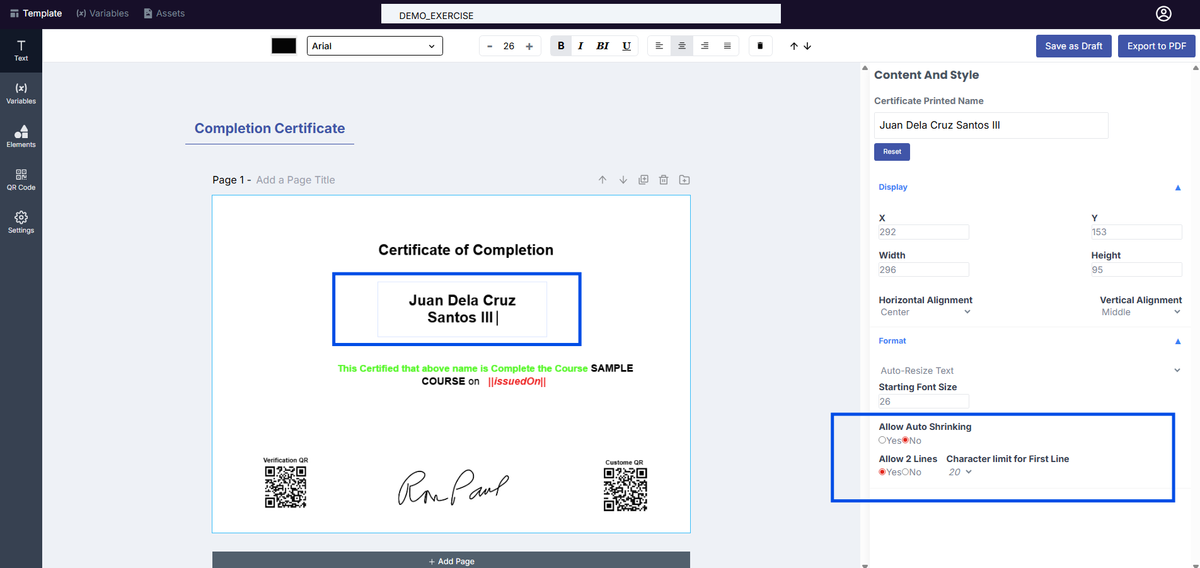
5. Once enabled, configure the Character Limit for First Line
- Example: 20 characters
6. Check how the variable behaves.
7. Once satisfied, click Save as Draft.
How It Works
- The system checks the Character Limit for First Line
- If the text exceeds the limit, it moves to the second line
- If not, it remains in one line
Example Scenarios (Based on Actual Behavior):
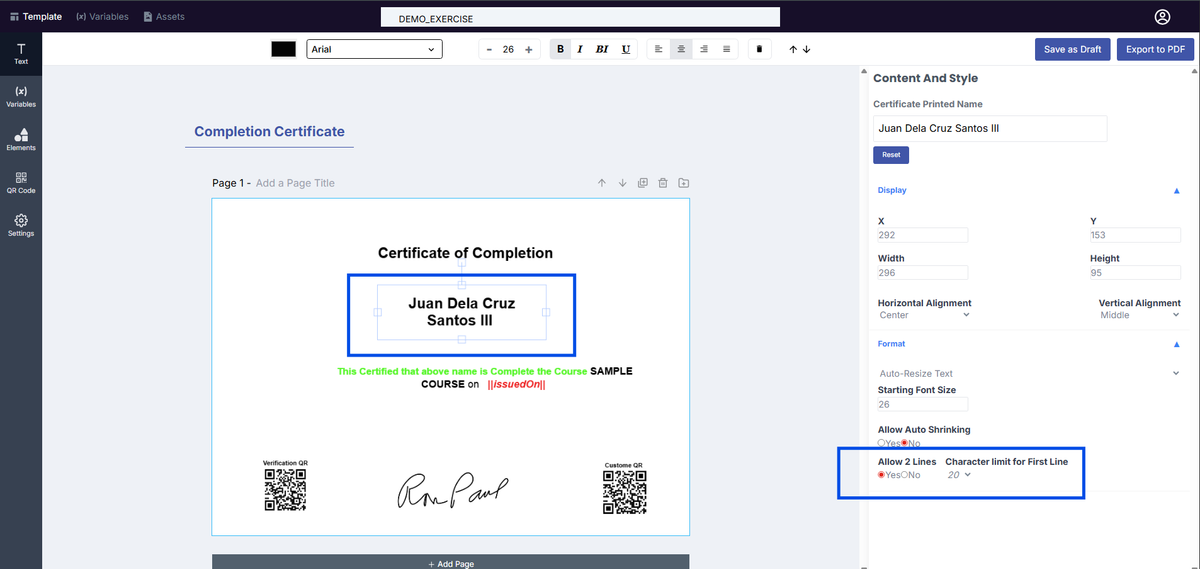
Scenario 1: Character Limit = 20, Allow 2 Lines = YES
- Variable: Certificate Printed Name
- Value: Juan Dela Cruz Santos III
Since the text exceeds 20 characters, it will break into two lines:
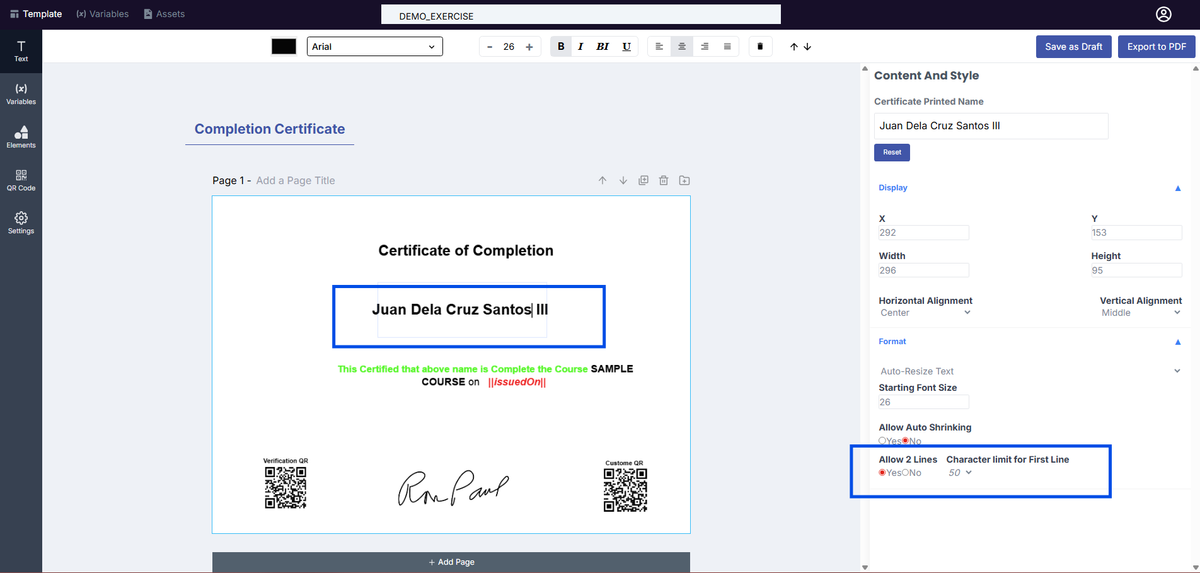
Scenario 2: Character Limit = 50, Allow 2 Lines = YES
- Variable: Certificate Printed Name
- Value: Juan Dela Cruz Santos III
Since the text does NOT exceed 50 characters, it will remain in one line:
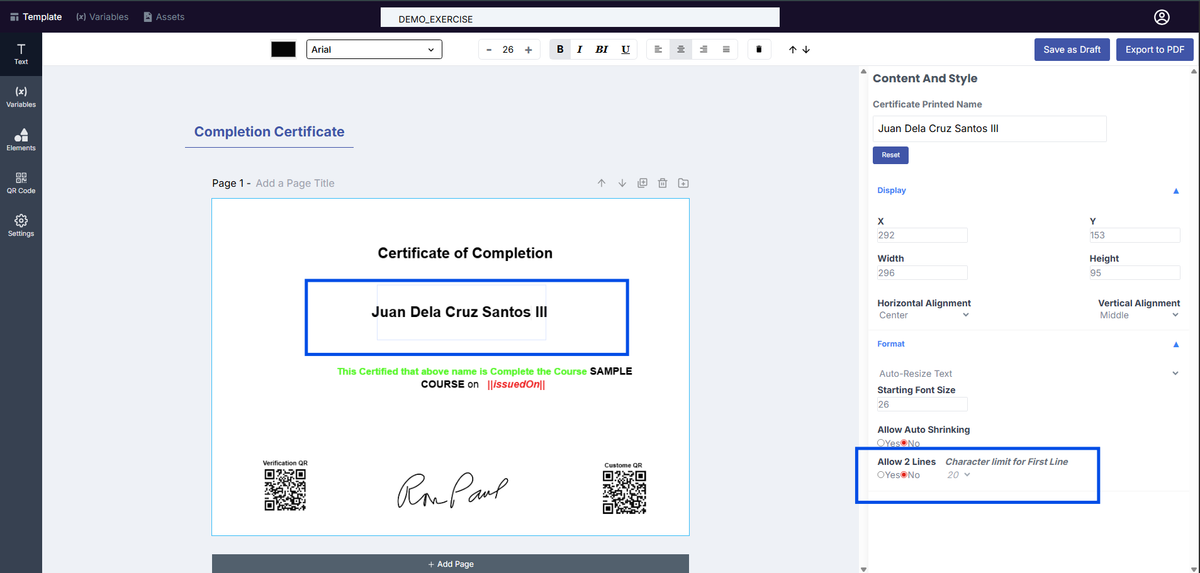
Scenario 3: Character Limit = 20, Allow 2 Lines = NO (Even if limit is set)
- The variable will always stay in one line
- The Character Limit setting will not apply
Important Reminder:
- Character Limit for First Line is only available when Allow 2 Lines = YES
- This feature works only on standalone variables.
- It will NOT work if the variable is inside a paragraph
- Make sure the variable is selected before applying changes
Notes:
- Ideal for long names and titles
- Prevents layout overflow issues
- Adjust the character limit based on your design spacing
- Can be combined with Auto Shrinking for better control