

What is the Event Check-In Feature?
On this page
What is the Event Check-In Feature?
The Event Check-In feature allows Issuing Authorities (IAs) to monitor and verify an attendee's attendance at an event.
This feature is useful for events where the organizer needs to confirm that an attendee has arrived before granting access to the event or providing an event-related document, such as a certificate or credential.
Attendees must have a ticket for the event before they can be checked in.
There are two ways to check in an attendee:
- Manual Check-In – Used to manually check in attendees using the Issuing Authority page.
- QR Code Check-In – Used to scan the QR code from an attendee's digital or physical ticket.
1. Set Up Tickets for the Event
Before attendees can be checked in, the event must have at least one ticket available for purchase.
1. Go to the Event and create or open the event you want to configure.
2. Set up the event's Cart. To configure the Cart head to this helpdesk article Event Payment Tab: https://helpdesk.filpass.ph/article/event-payment-tab
Once tickets are set up, attendees can purchase tickets for the event and receive their corresponding ticket.
Note: An attendee must have a valid ticket before they can be checked in.
2. Check In an Attendee
After an attendee has purchased a ticket, they can be checked in when they arrive at the event.
Option 1: Manual Check-In
To perform a Manual Check-In:
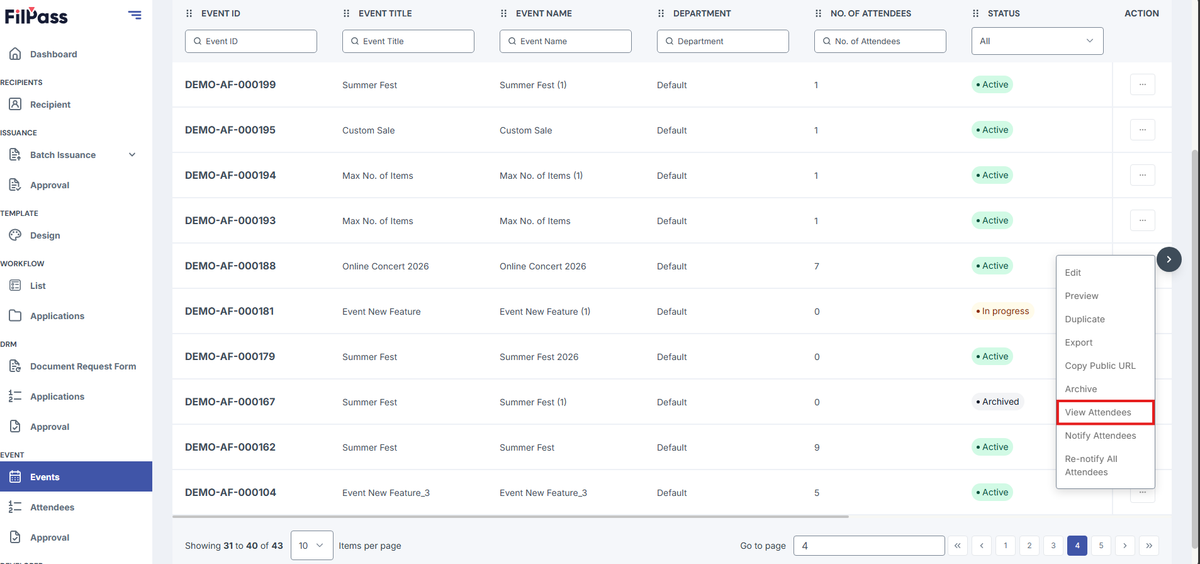
1. Go to the event, click View Attendees
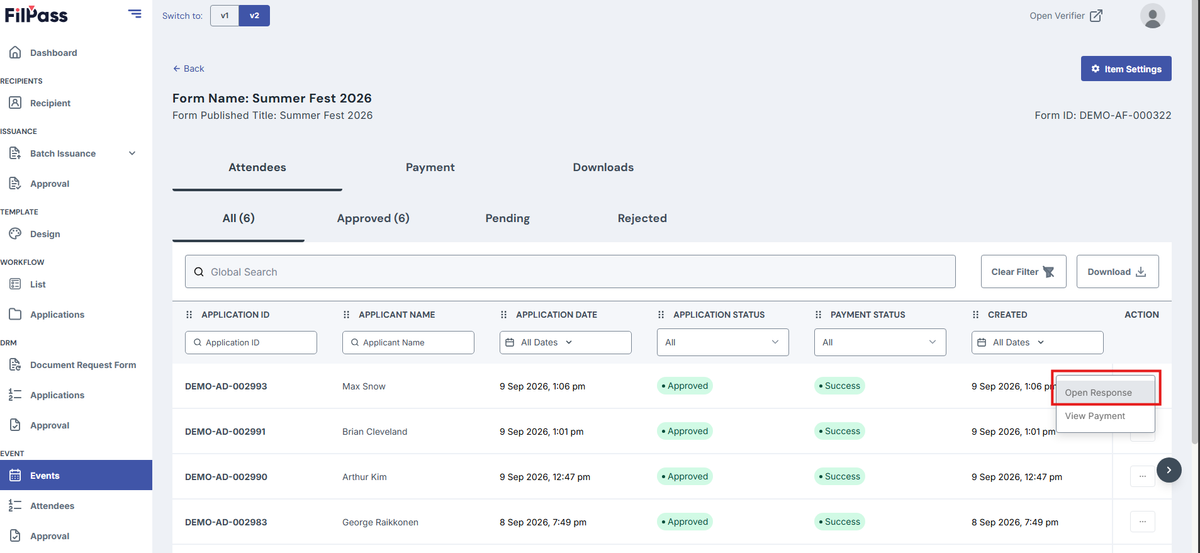
2. Locate the attendee. Then click Open Response
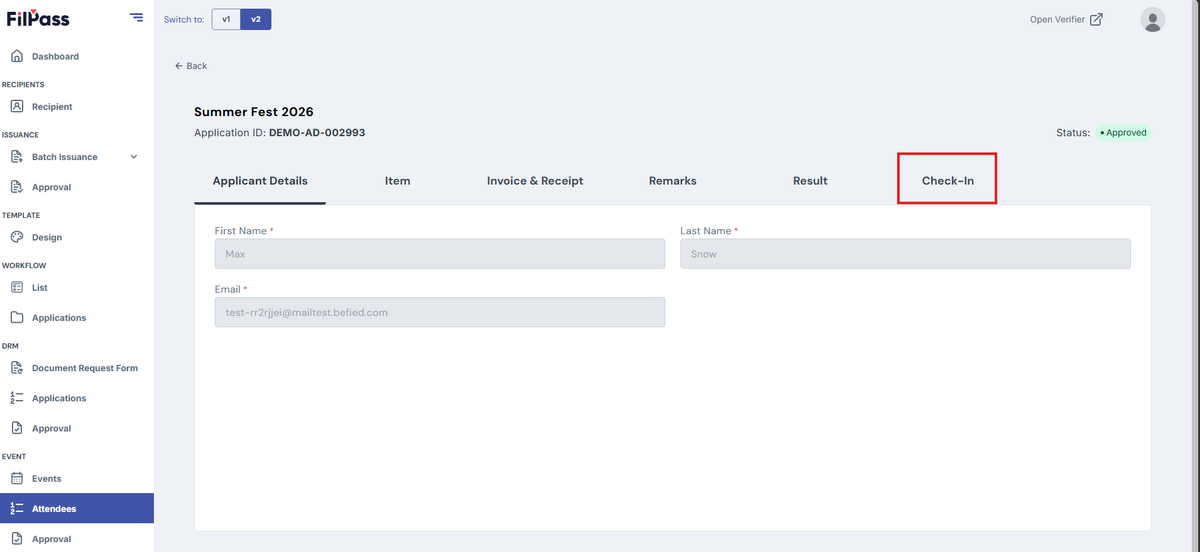
3. Go to the Check-In tab.
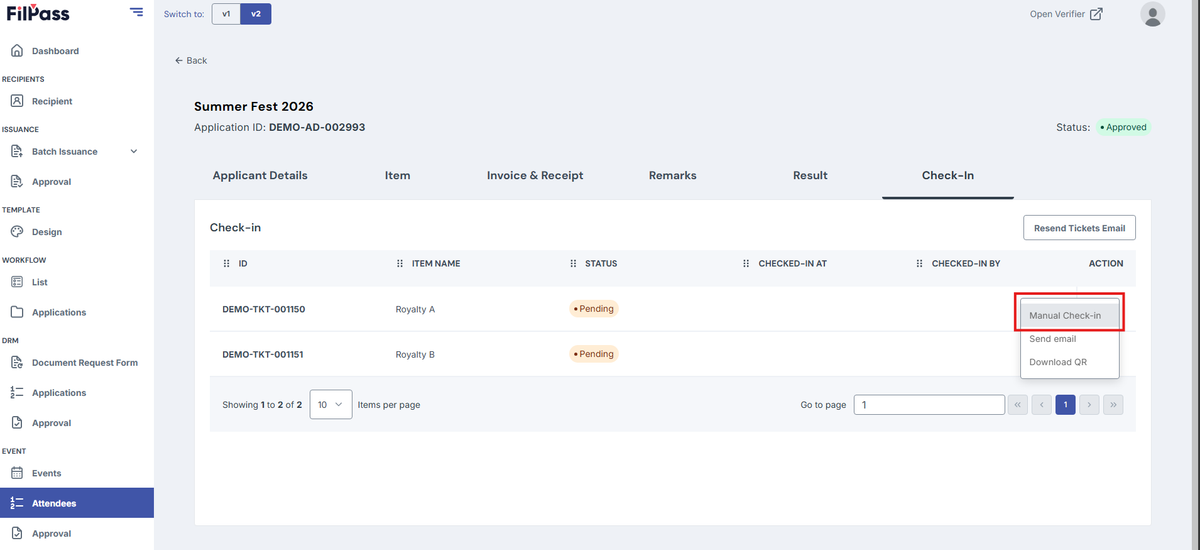
4. Click on the action button and select Manual Check-In.
5. A success message will appear once the attendee has been successfully checked in.
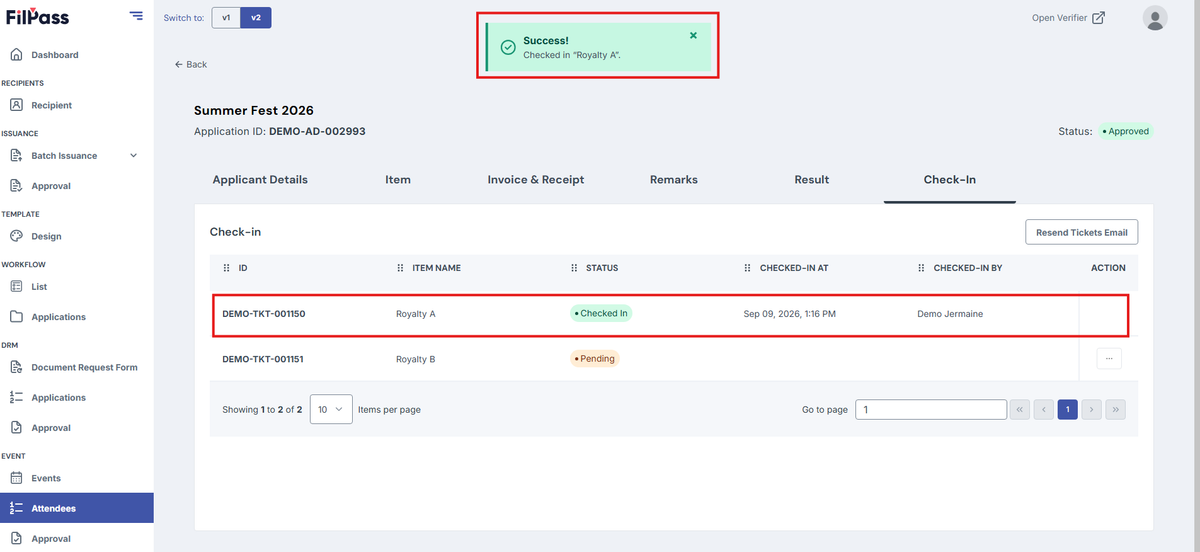
Walkthrough Video of Manual Check-In
Note: Only users with the Can Perform Check In permission can perform a Manual Check-In on behalf of an attendee.
Option 2: QR Code Check-In for Events
To perform a QR Code Check-In:
1. Open the Event Check-In page on a mobile device:
2. Log in using your Issuing Authority account or Sub-Account with a Can Perform Check In permission.
3. Select the appropriate Event from the dropdown.
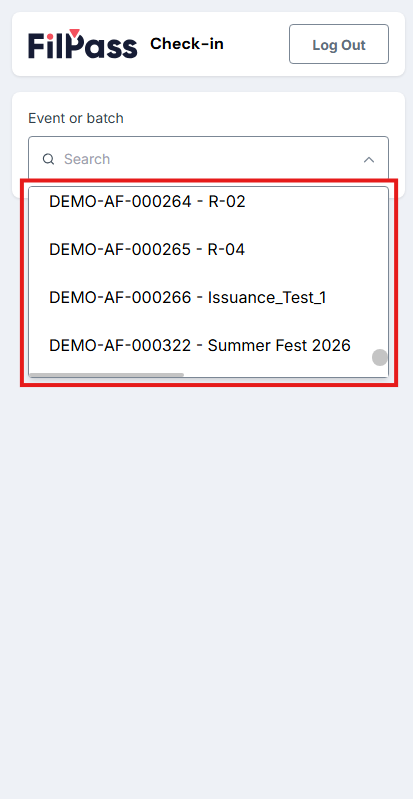
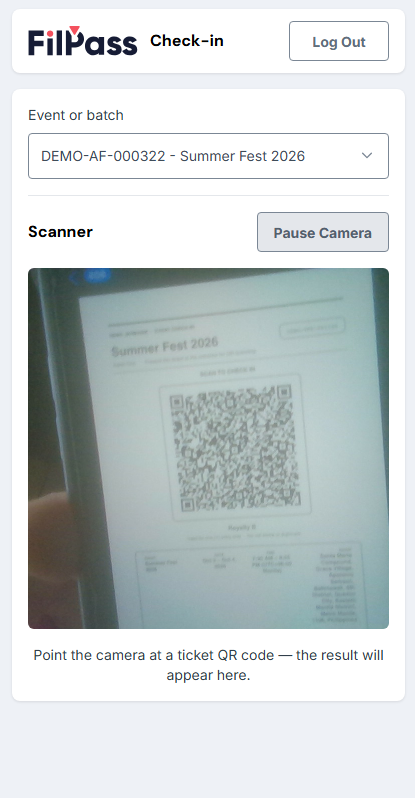
3. Scan the QR code displayed on the attendee's digital ticket.
4. Once the QR code is successfully validated, the attendee will be checked in for the selected event.
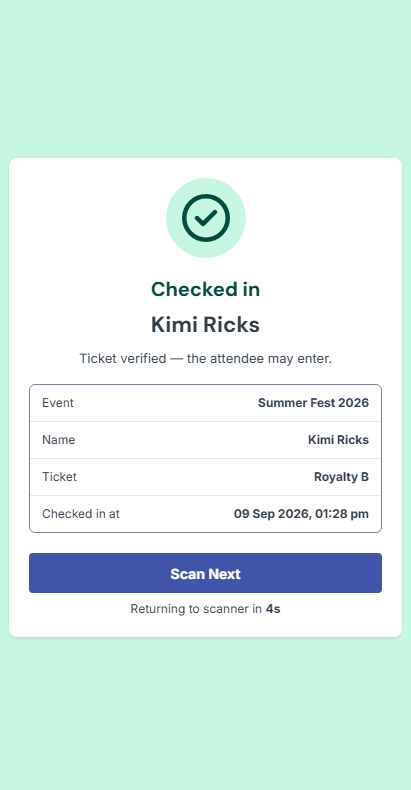
Walkthrough Video of Manual Check-In
Check-In Messages and Common Scenarios
The following messages may appear when performing an Event Check-In:
Incorrect Event Selected
If the selected event does not match the event associated with the QR code being scanned, an error message will be displayed.
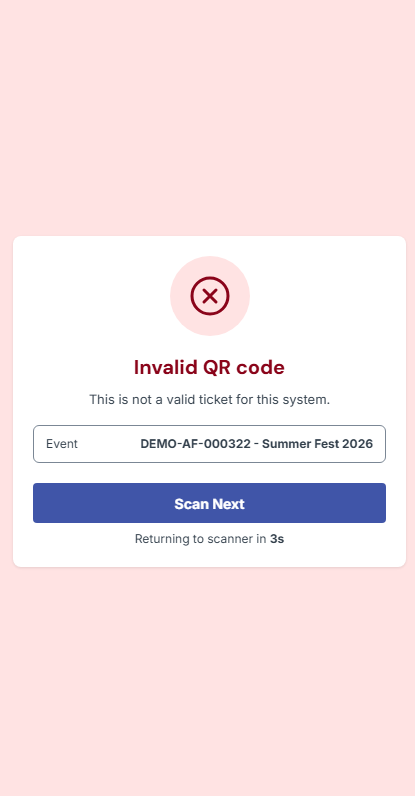
Make sure that the correct event is selected before scanning the attendee's digital ticket QR code.
QR Code Already Used
If the QR code has already been scanned successfully, an error message will be displayed.
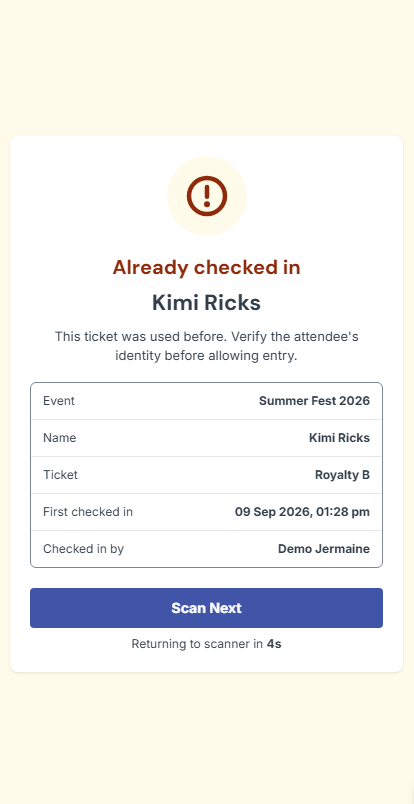
This indicates that the attendee has already been checked in using that QR code.