
Event Payment Tab
This section explains the Payment Tab of an Event.
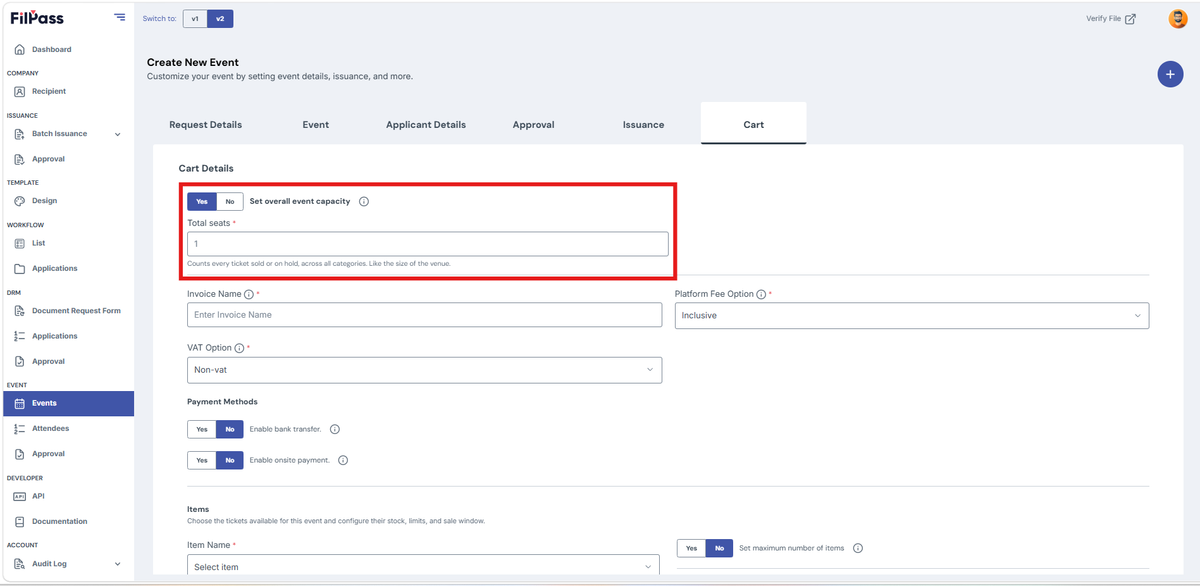
1. Under "Cart Details," enable the "Set Overall Event Capacity" option by toggling it to "Yes" if you want to define a capacity limit for the event. Toggle it to "No" if you do not wish to set an event capacity.
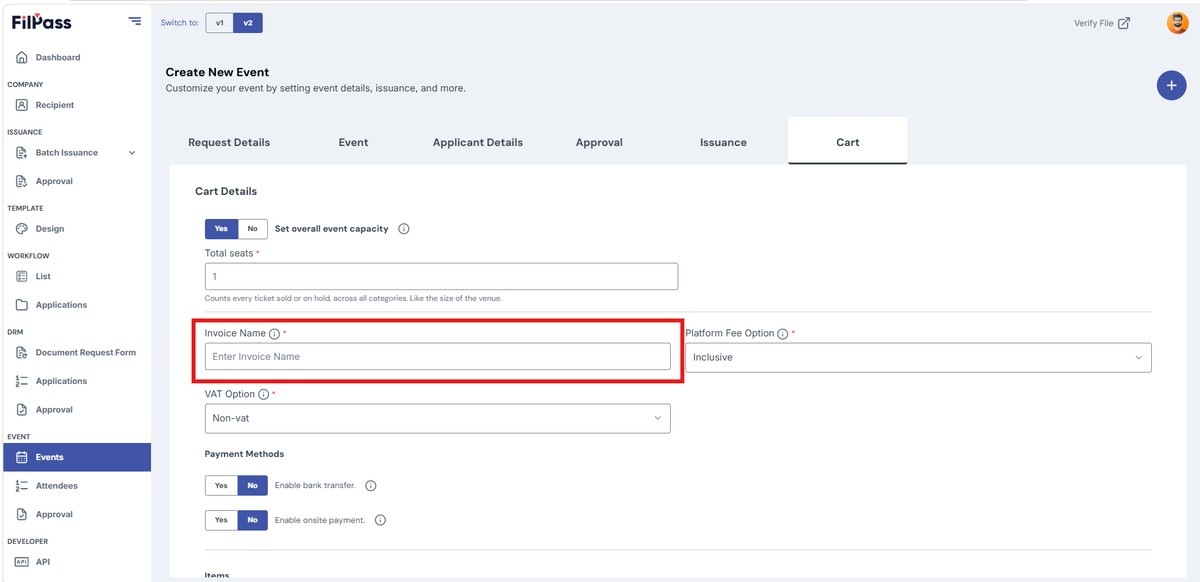
2. Add “Invoice Name”
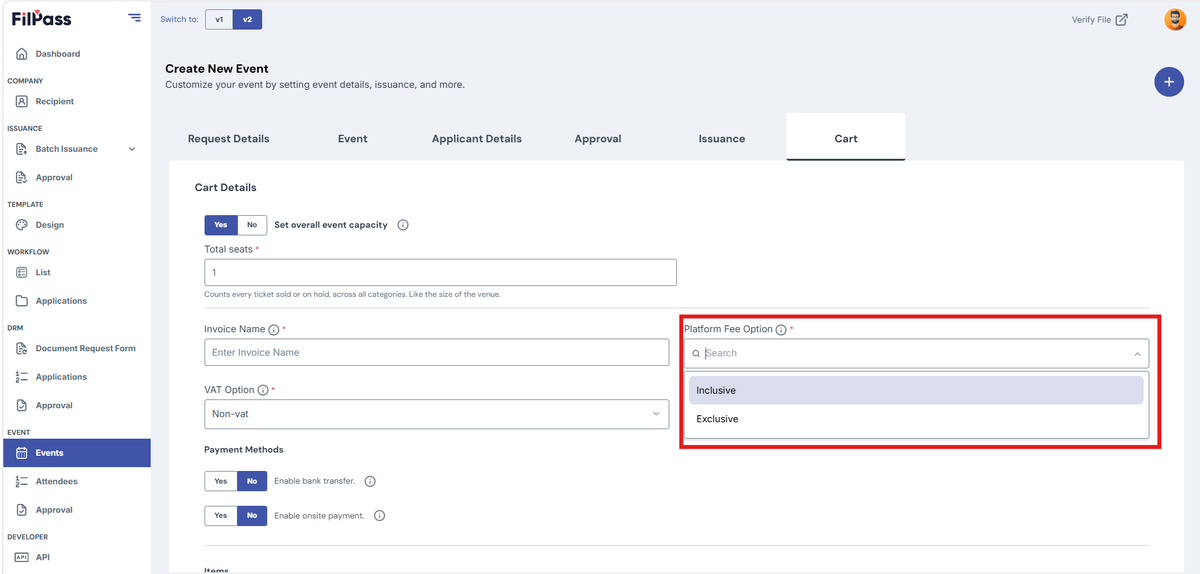
3. Select your Platform Fee Option.
- Platform Fee Option:
- Inclusive: The platform fee is included in the transaction
- Exclusive: The platform fee is charged separately from the initial transaction.
- Platform Fee VAT:
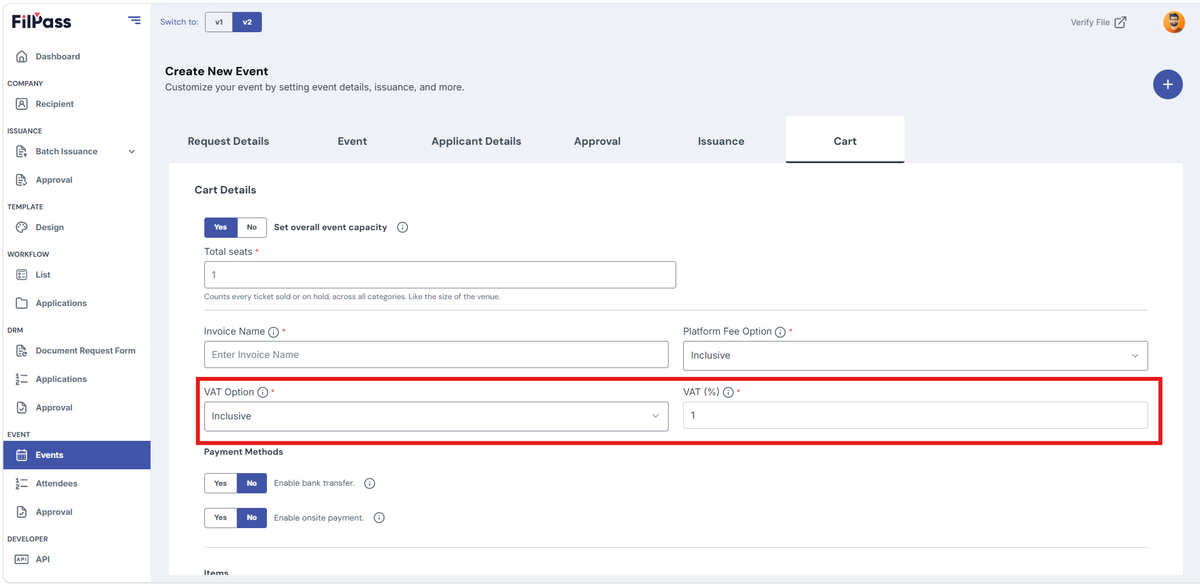
Note: Will only appear if Vat Option is set to either Inclusive or Exclusive
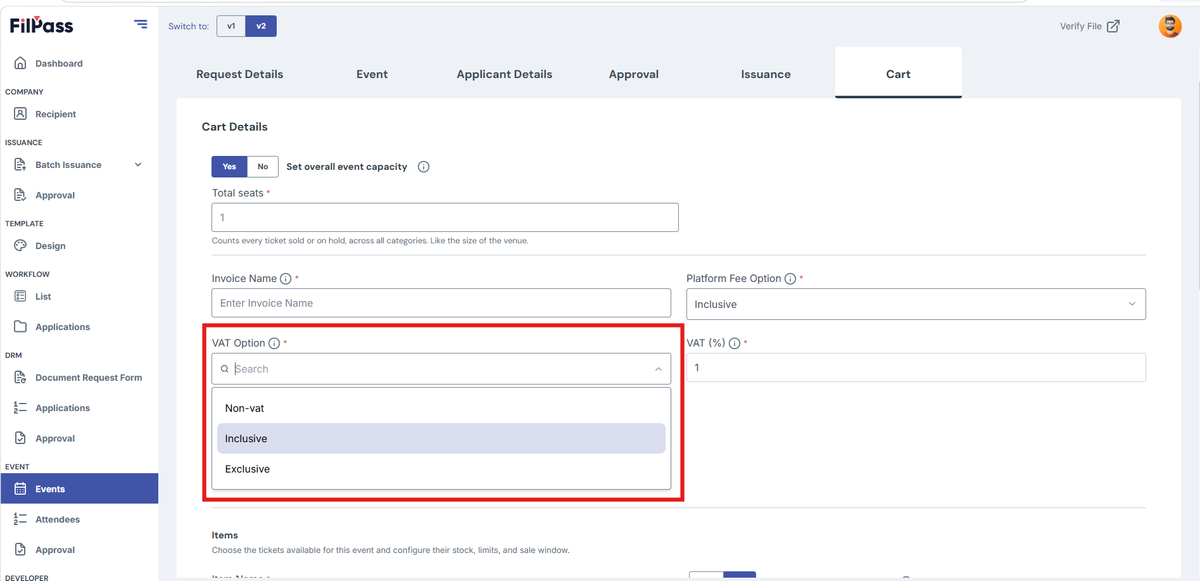
4. Select a VAT Option.
- VAT Option:
- Inclusive: VAT is included
- Exclusive: VAT is not included
- Non-VAT: VAT is not included
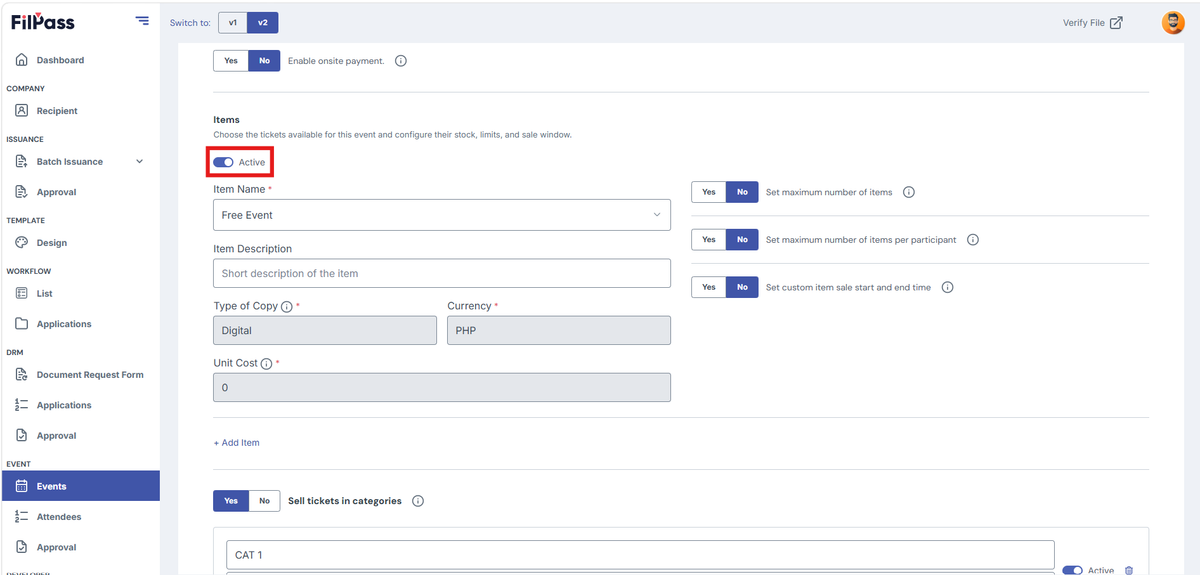
5. Enable the "Active" toggle to make the item active.
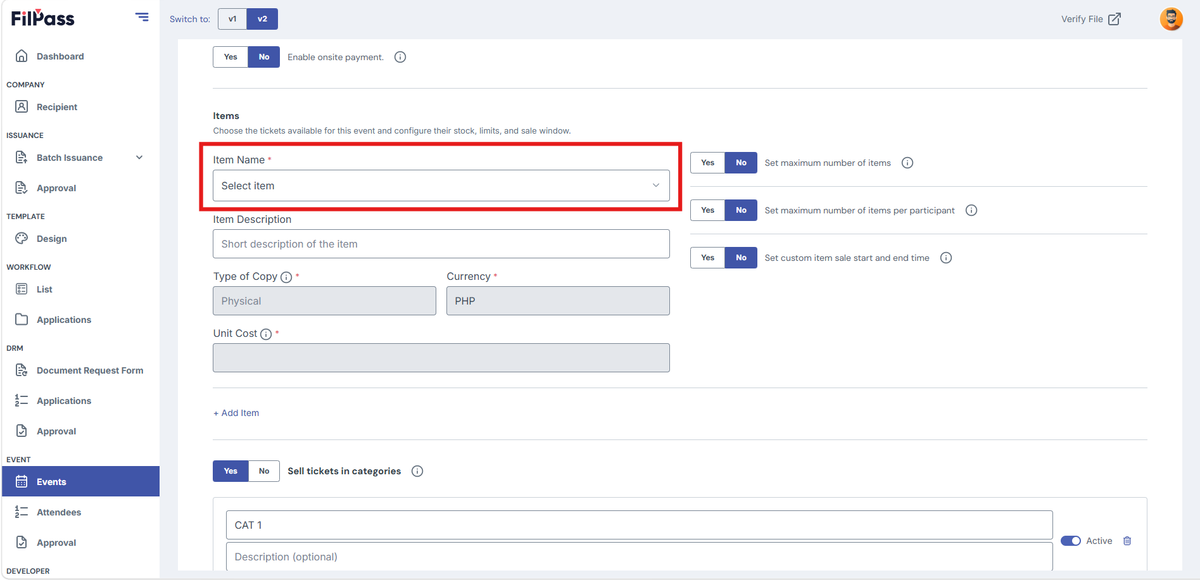
6. Select Item Name of the item to be issued.
7. Type the Item Description of the item to be issued.
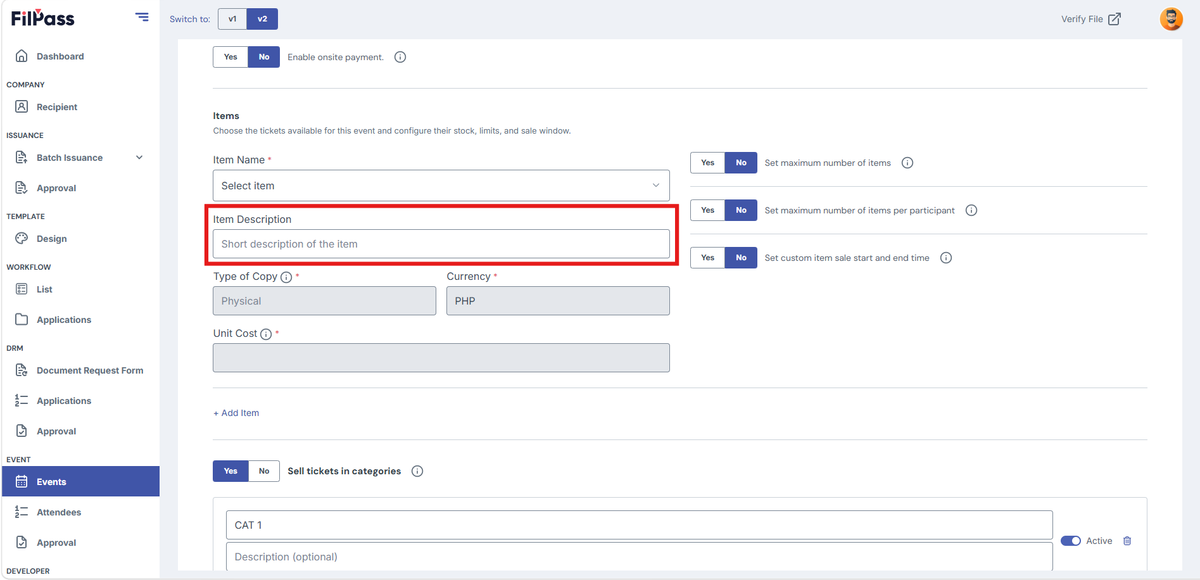
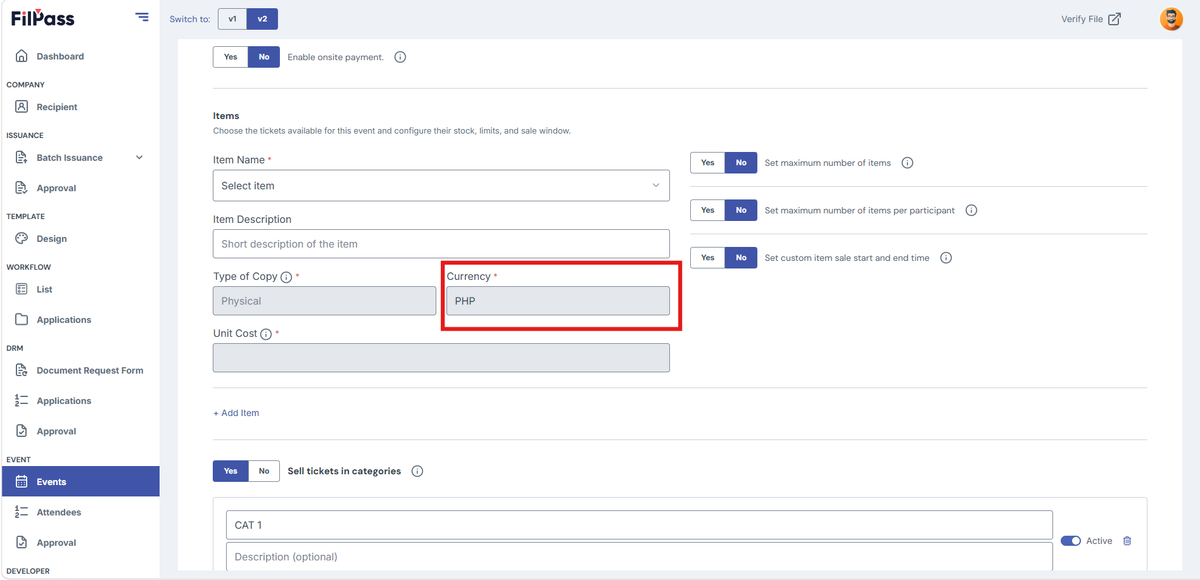
8. Under "Currency" the currency is set to default.
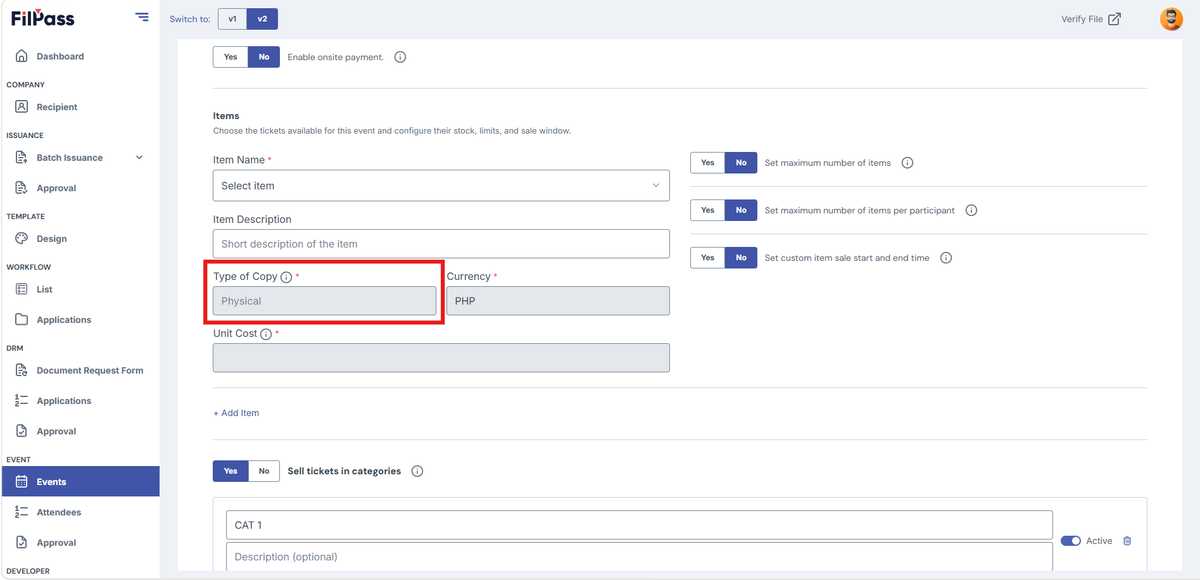
9. Under “Type of Copy” it will be set automatically based on the Selected Item
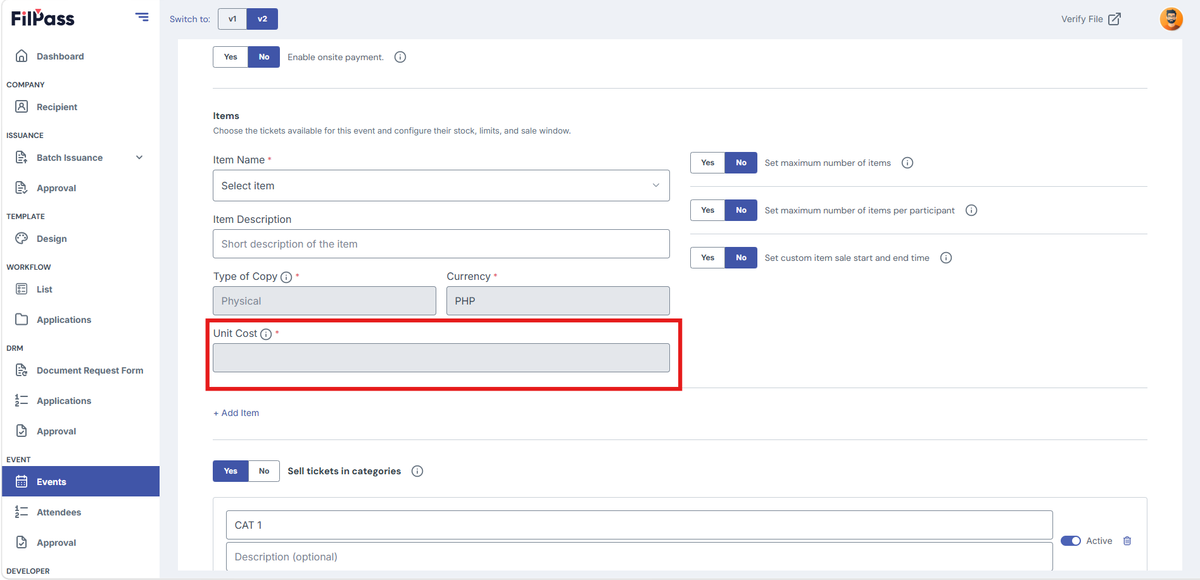
10. The Unit Cost for each unit will be set automatically based on the selected item.
11. If more items are needed, click Add Item.
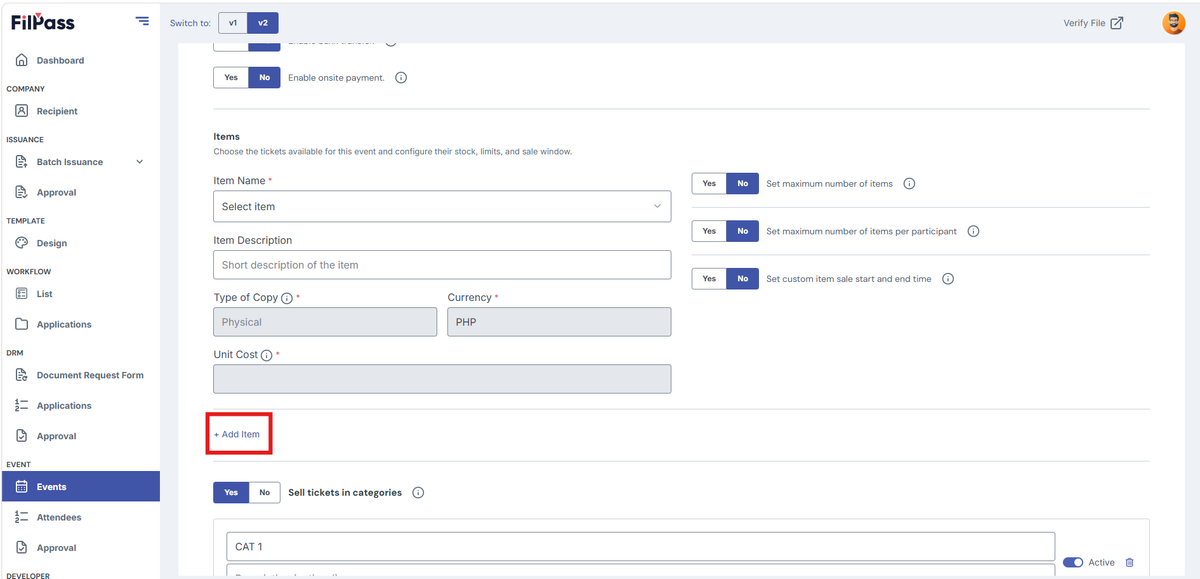
Under “Payment Tab” there are three (3) toggles to customize the items
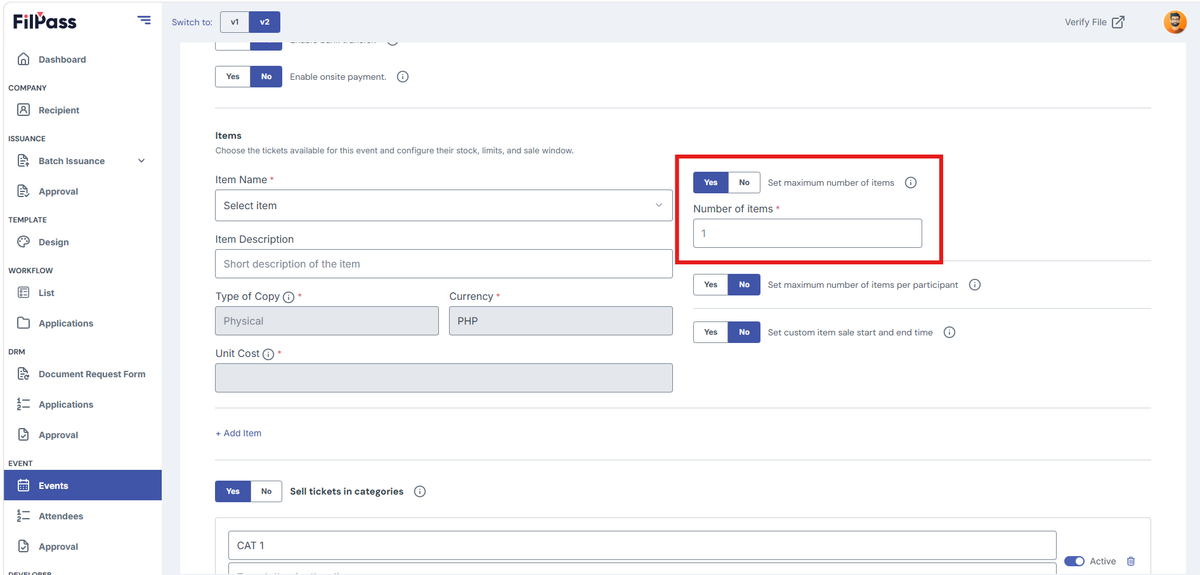
A. Set Maximum Number of Items (No in default)
- YES – Allows user to set maximum number of items available
- Number of Items input field will be visible
- NO – Does not allow setting a maximum number of items (items remain unlimited).
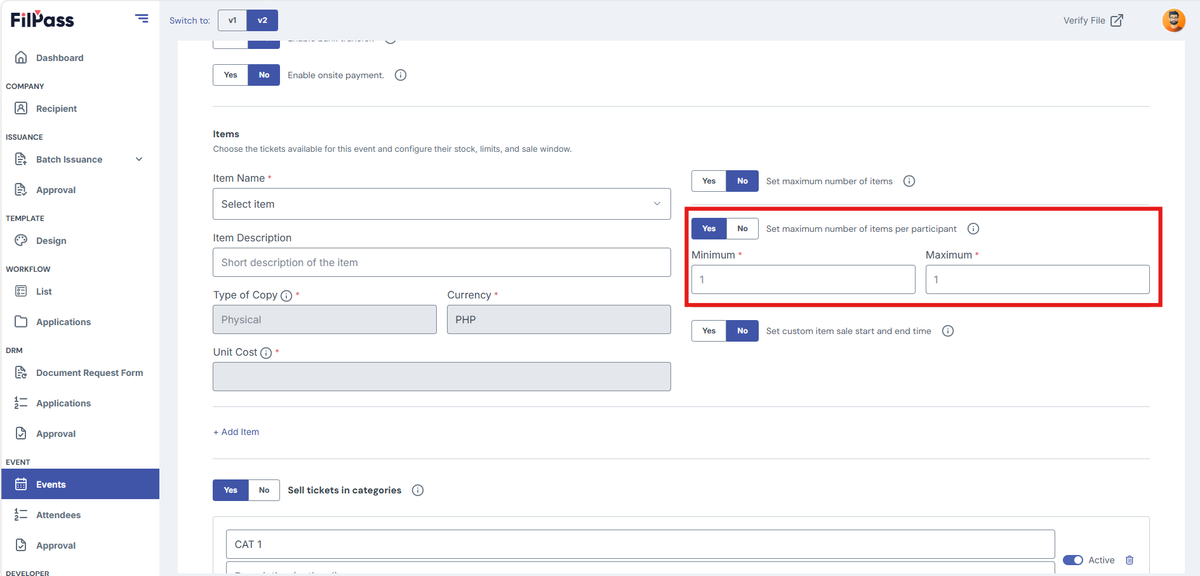
B. Set Maximum Number of Items per Participant (No in default)
- YES – Allows setting a limit on how many items each participant can select or avail.
- Minimum and Maximum input field will be visible
- NO – Does not limit the number of items per participant.
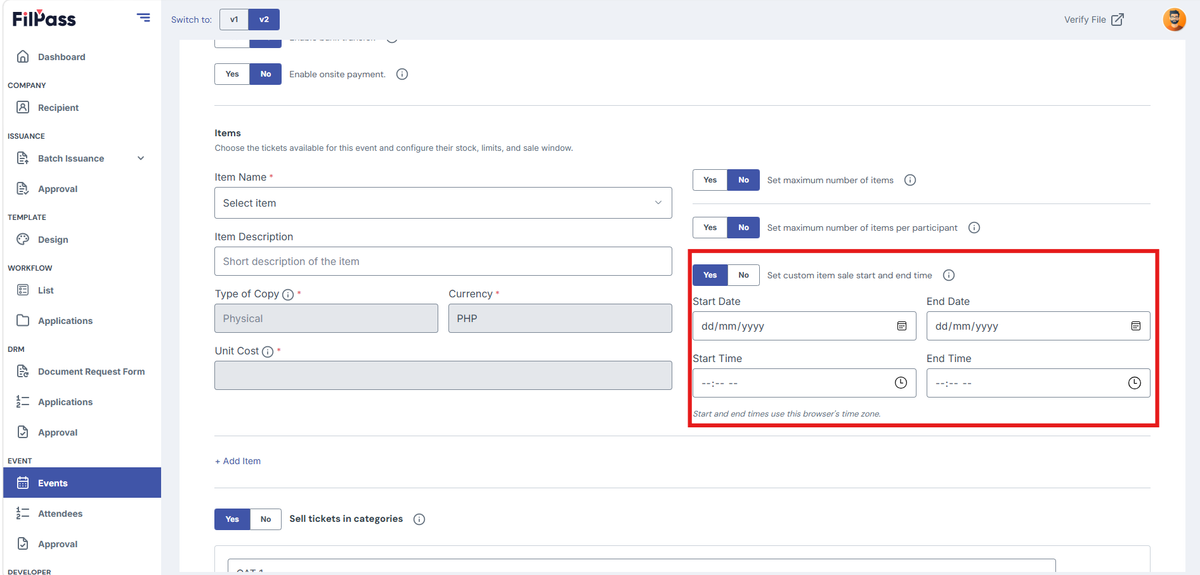
C. Set Custom Item Sale Start and End Time (No in default)
- YES – Allows defining a specific start and end time for when the item will be available for sale.
- Start Date and End Date picker will be visible
- Start Time and End Time picker will be visible
- NO – Uses the default sale period (no custom start and end time is applied).
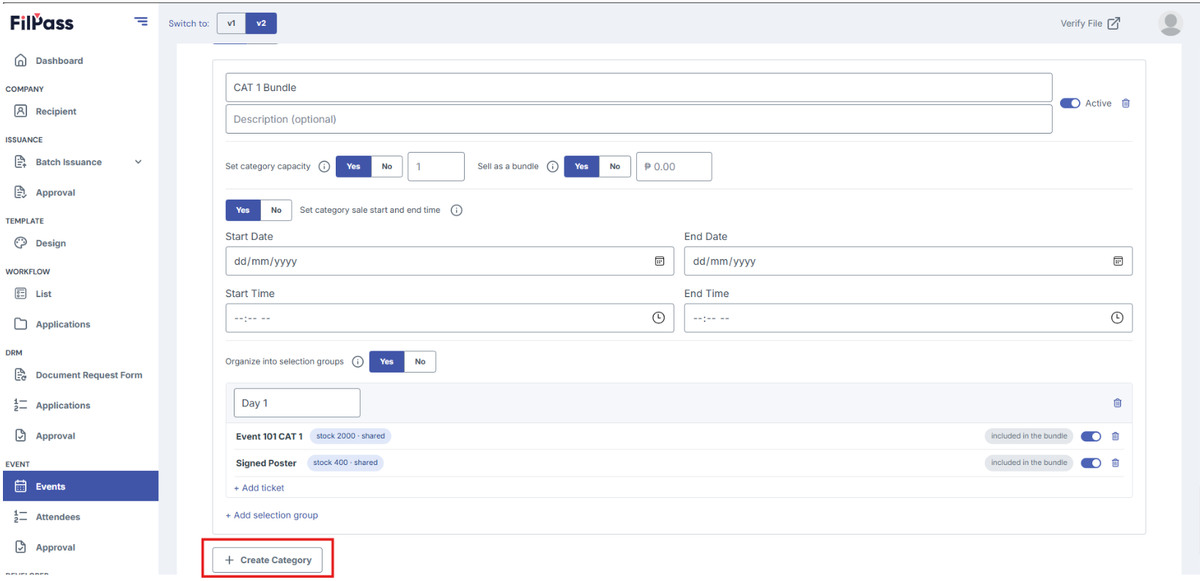
12. Configure Ticket Categories
Enable Sell Tickets in Categories if you want to organize tickets into categories or bundles.
- Yes – Tickets can be grouped into one or more categories.
- No – Tickets are sold individually without categories.
When categories are enabled, you can configure the following:
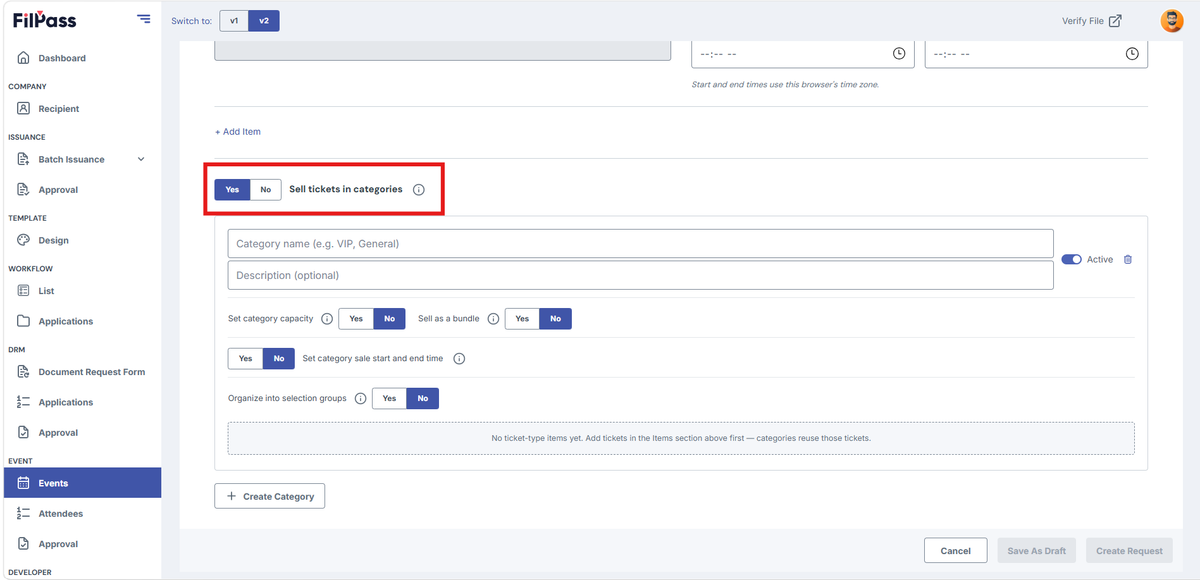
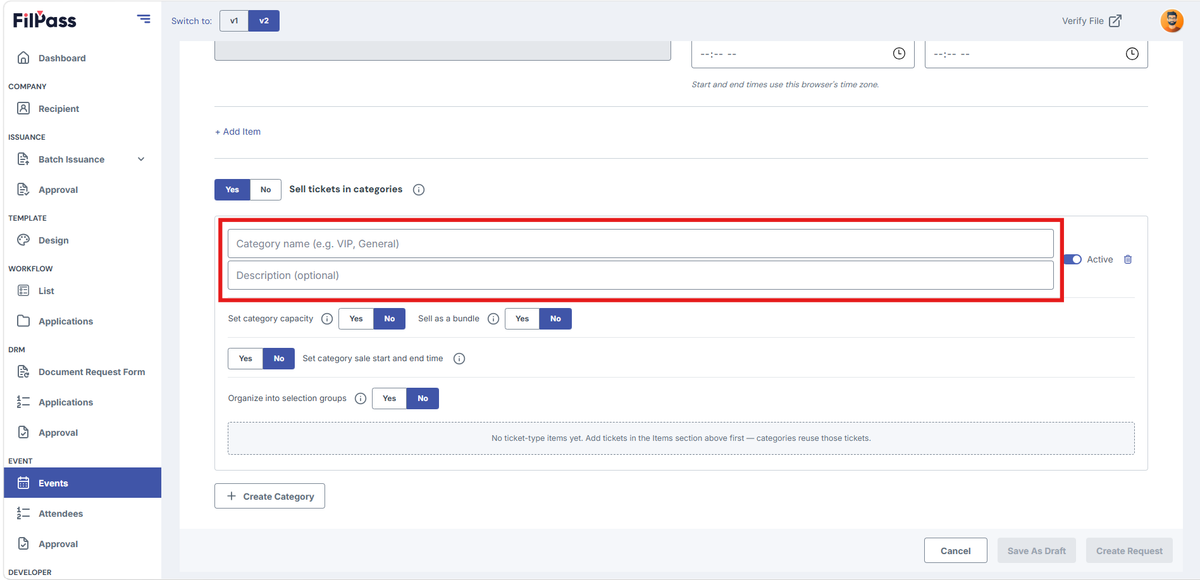
A. Enter Category Name and Description
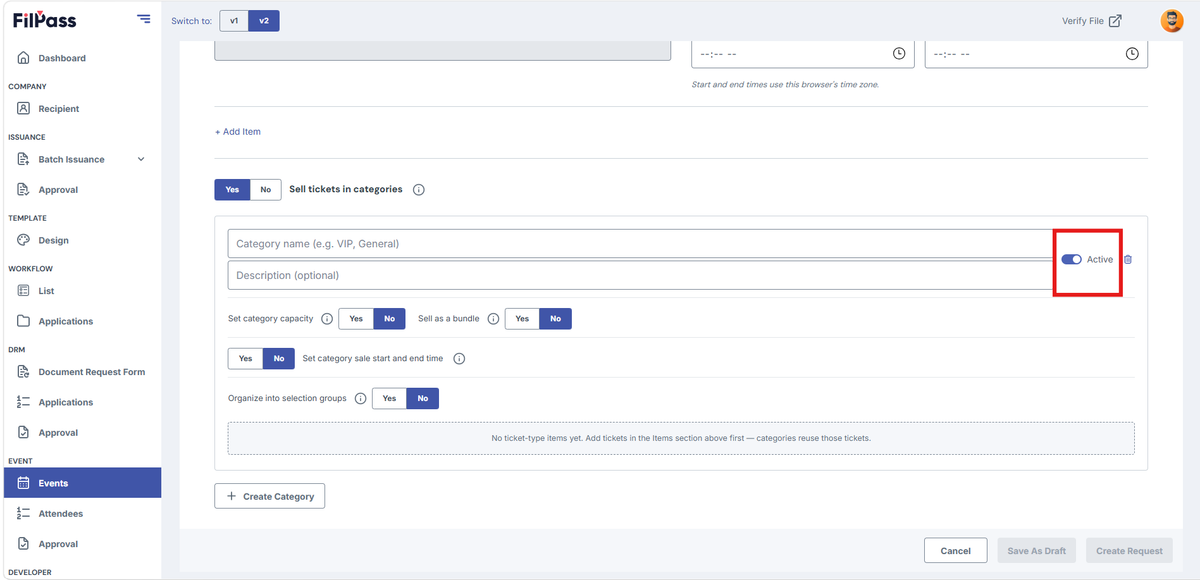
B. Activate or Archive the Category using status toggle
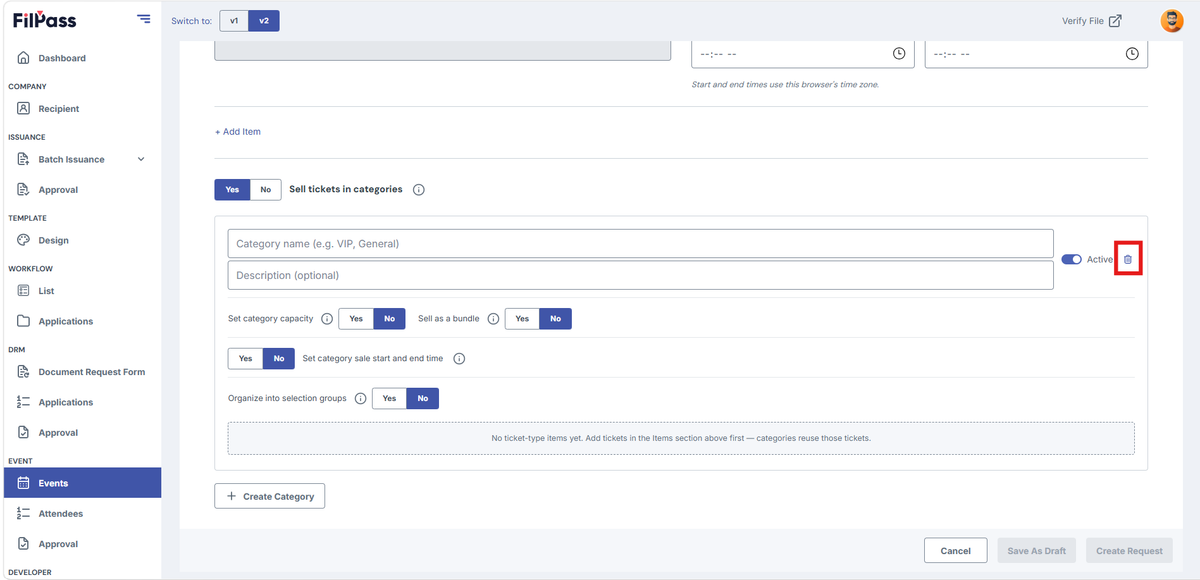
C. Delete the Category
D. Category Capacity
Specify the maximum number of tickets available in the category. Leave the field blank for unlimited availability.
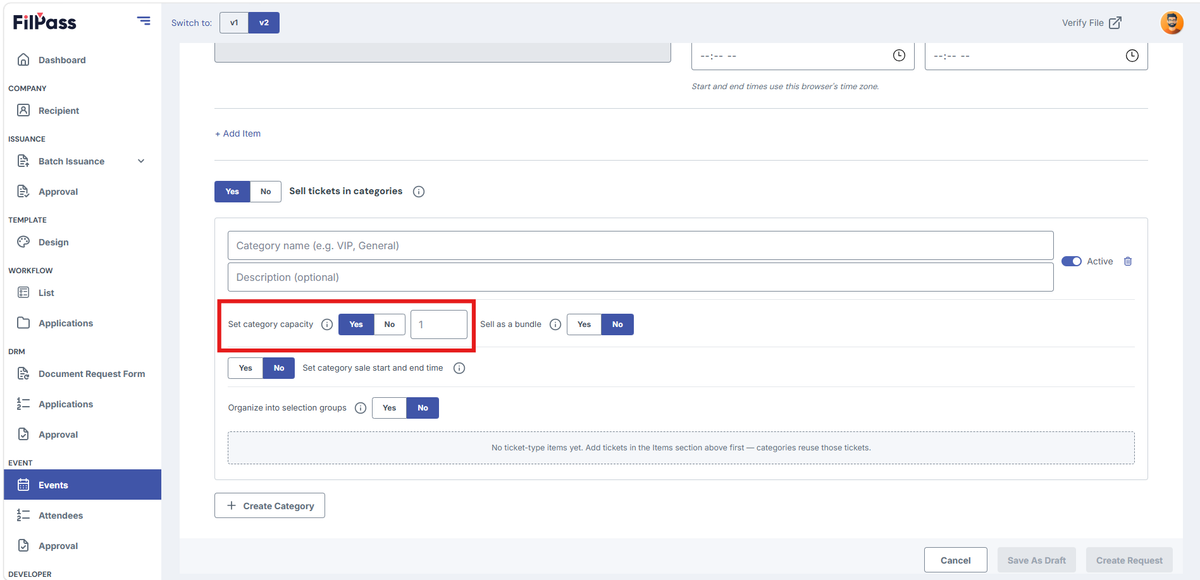
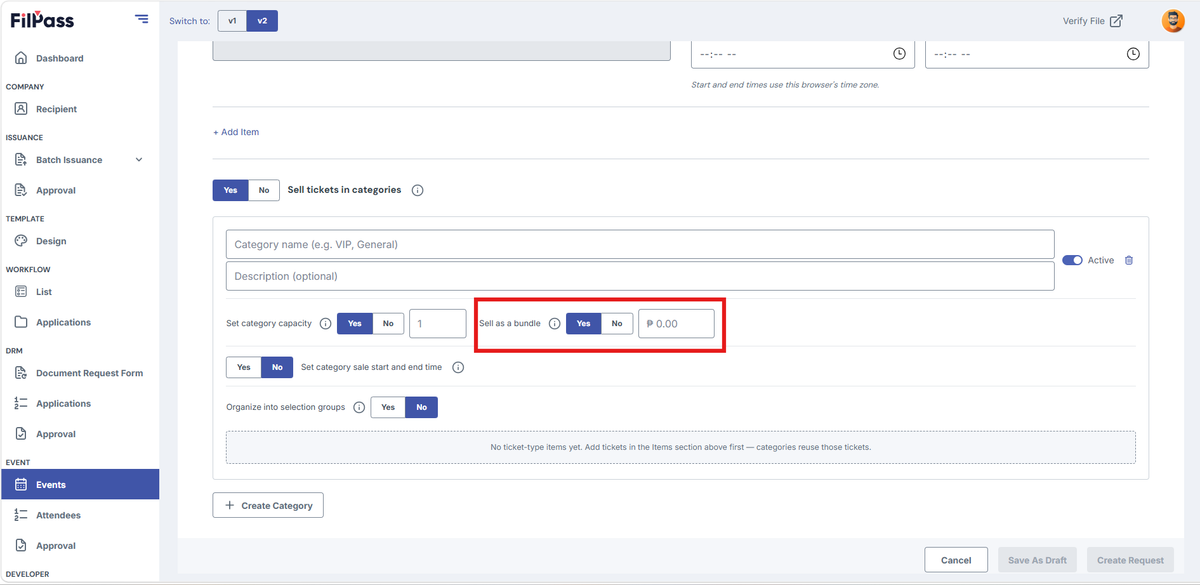
E. Sell as a Bundle
Choose how tickets within the category will be sold.
On – All tickets in the category are sold together for a single bundled price.
Off – Each ticket is priced and sold individually.
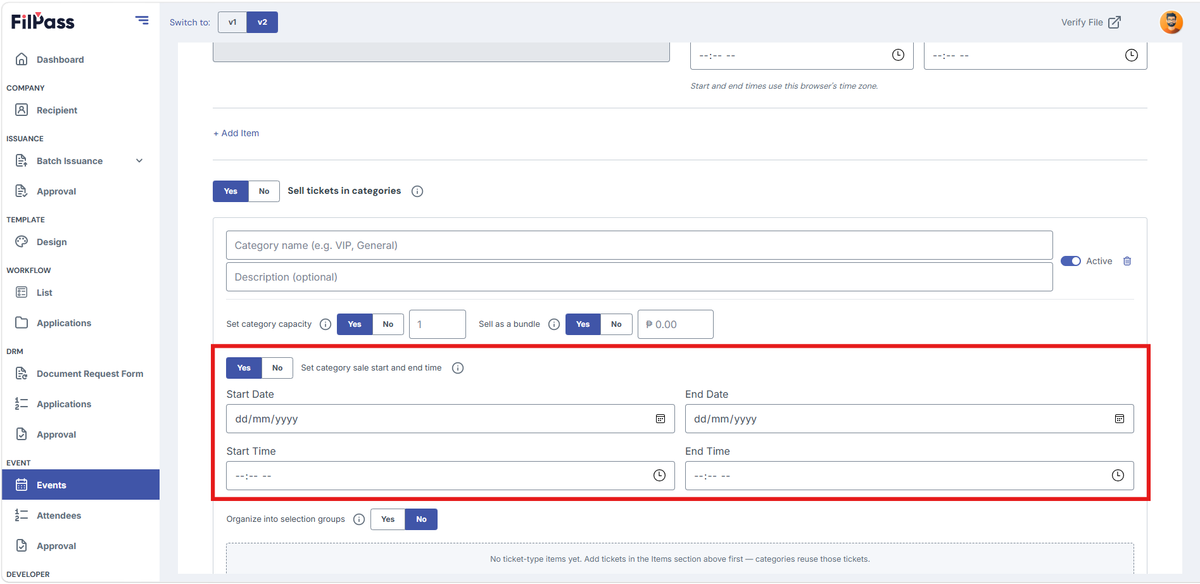
F. Set Category Sale Start and End Time
Enable this option to define a custom sales period for the category.
When enabled, specify:
- Start Date
- Start Time
- End Date
- End Time
G. Organize into Selection Groups
Choose whether to organize tickets into selection groups.
- Yes – Allows tickets to be grouped into sections such as seating zones, schedules, or ticket types.
- No – Tickets are listed without grouping.
Within each selection group, you can:
i. Enter the group name
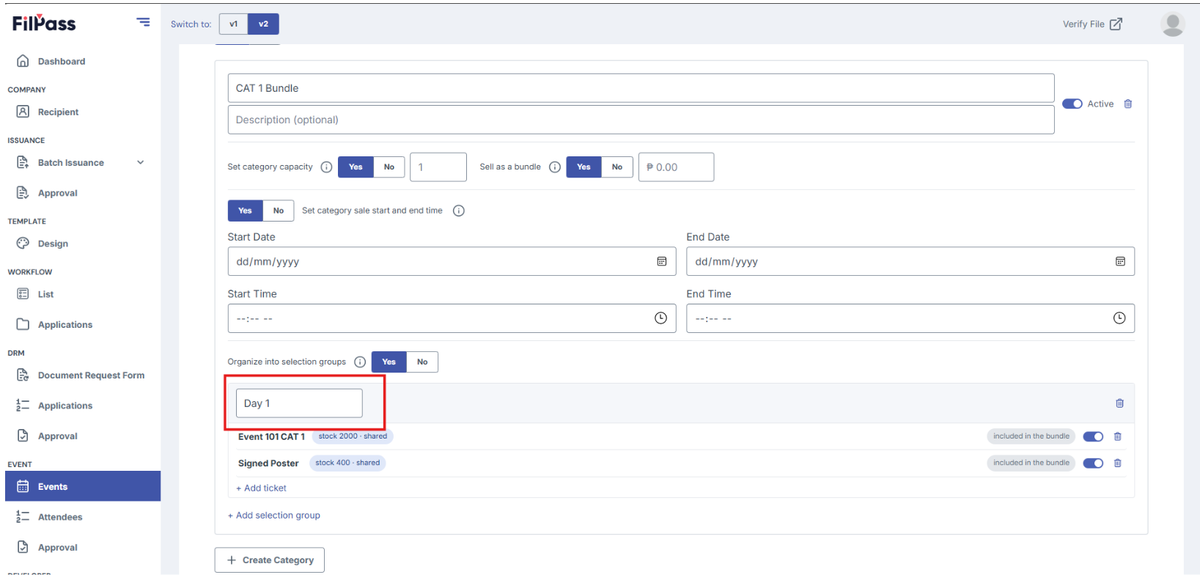
ii. Delete the group
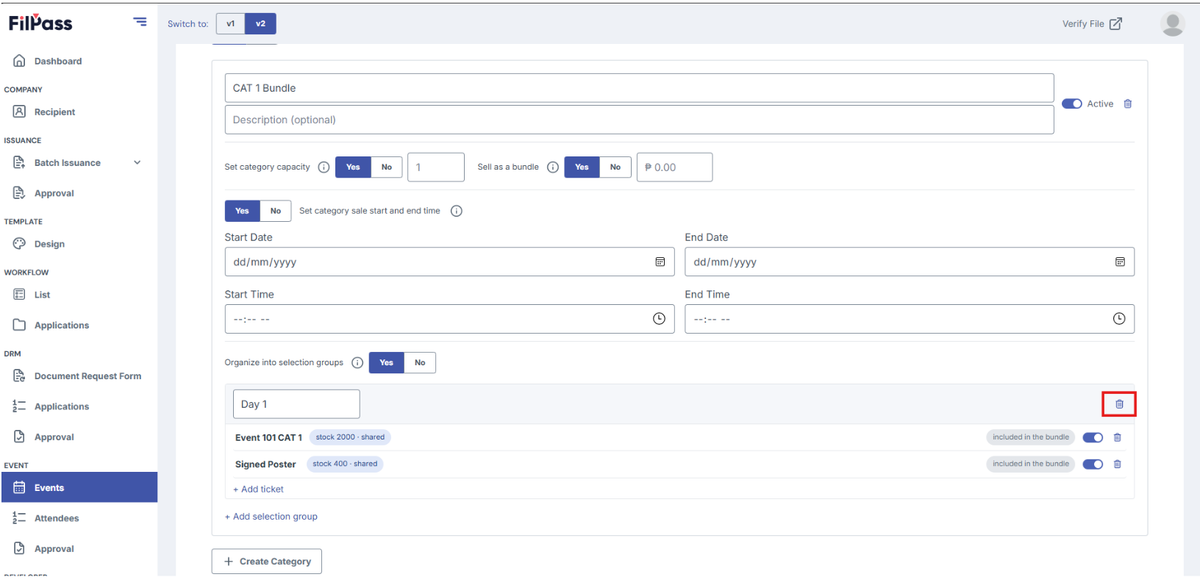
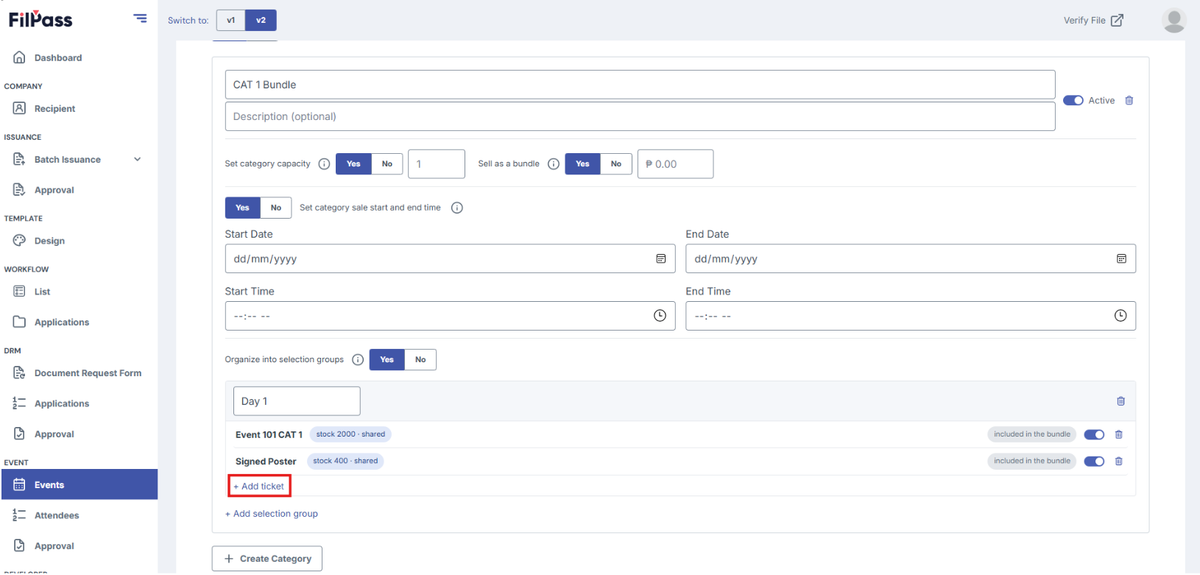
iii. Add Tickets to the group
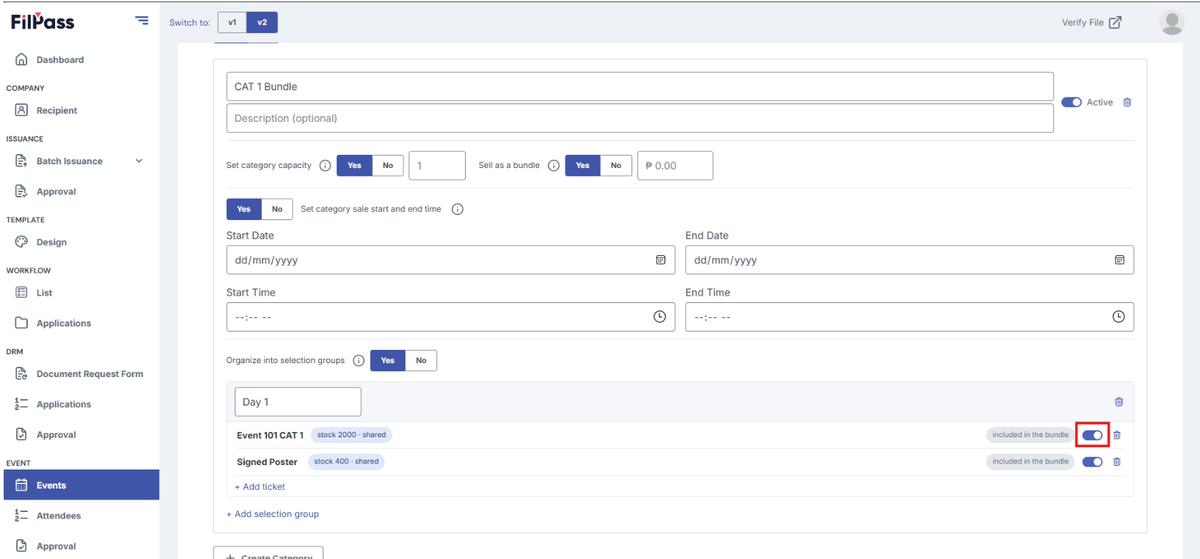
iv. Activate or deactivate individual tickets
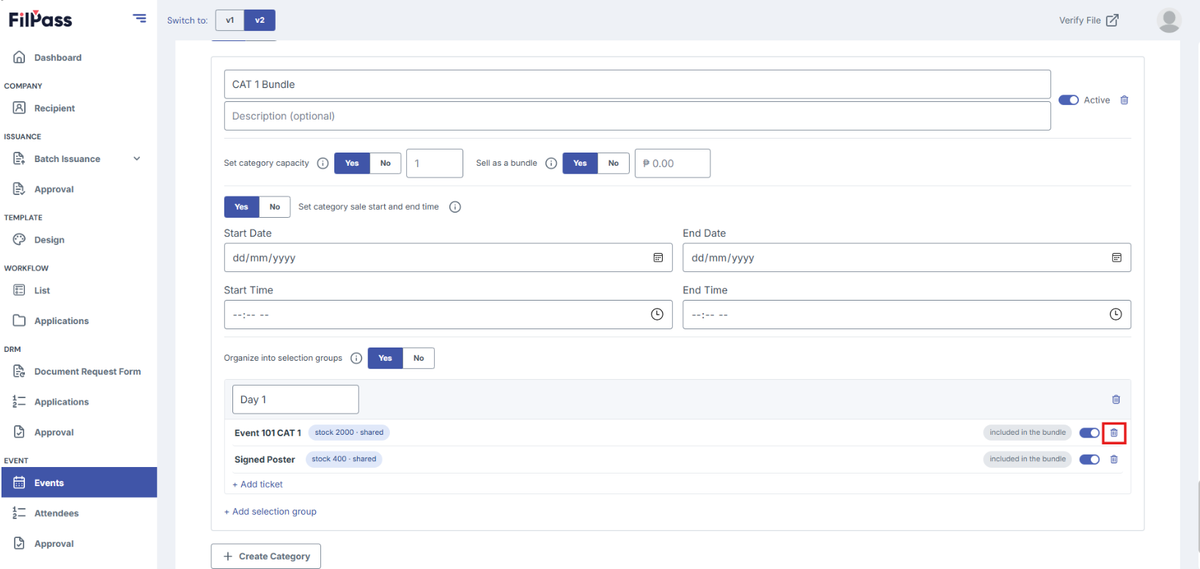
v. Delete tickets from the group
vi. Add additional selection groups as needed.
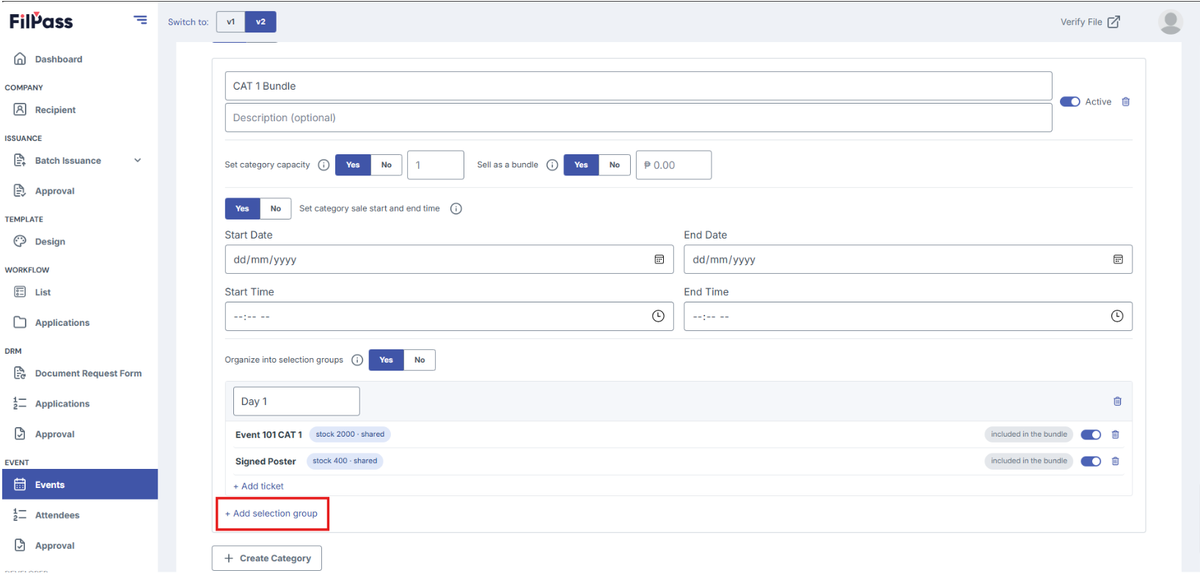
H. Click Create Category to add another ticket category for the event.