

How to Setup a Bundle
This article explains how to use the Sell Tickets in Categories feature to create ticket bundles. Bundles allow multiple tickets or items to be grouped together and sold as a single package with one price.
Before You Begin
1. Enable the Payment Module
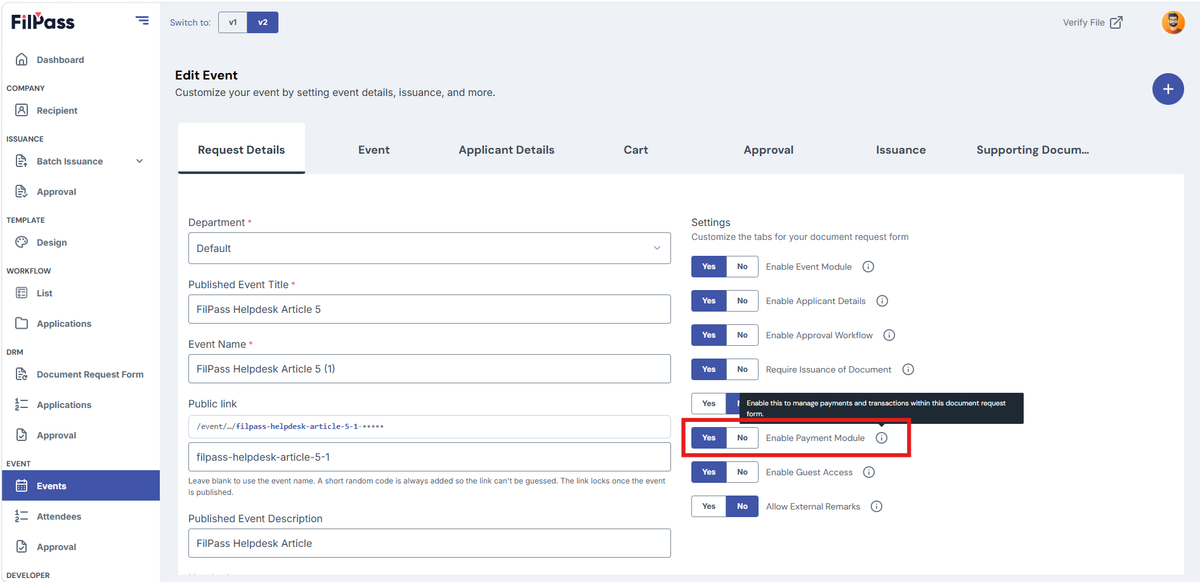
Ensure that the Payment Module is enabled for your event. If it has not yet been configured, navigate to the Request Details tab and enable the Payment Module toggle.
Refer to the screenshot below for guidance.
2. Configure the Payment Tab
Complete the Cart Details and Item configuration in the Payment tab before creating bundles.
For instructions, refer to the Event Payment Tab article. FilPass Helpdesk
Creating a Bundle
3. Enable Sell Tickets in Categories
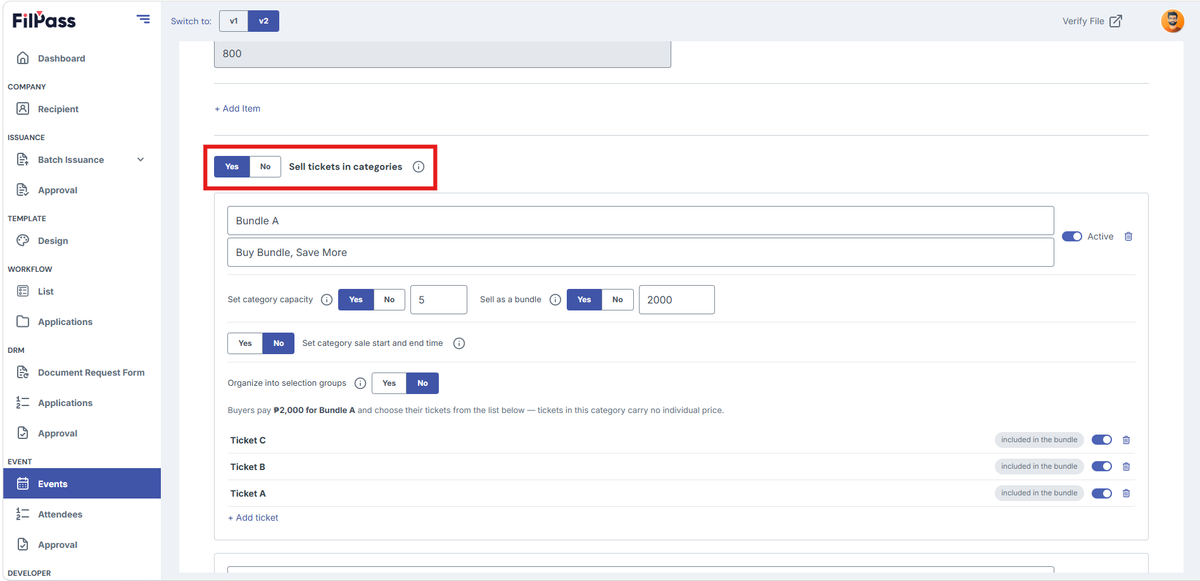
In the Item section of the Payment tab, enable the Sell Tickets in Categories toggle by selecting Yes.
- Yes – Tickets can be grouped into one or more categories.
- No – Tickets are sold individually without categories.
This allows you to organize tickets into categories and sell them as bundled packages instead of individual items.
4. Create a Category
Enter the following information:
- Category Name – A descriptive name for the bundle (for example, VIP Package or Conference Bundle).
- Category Description – A brief explanation of what is included in the bundle.
You may also:
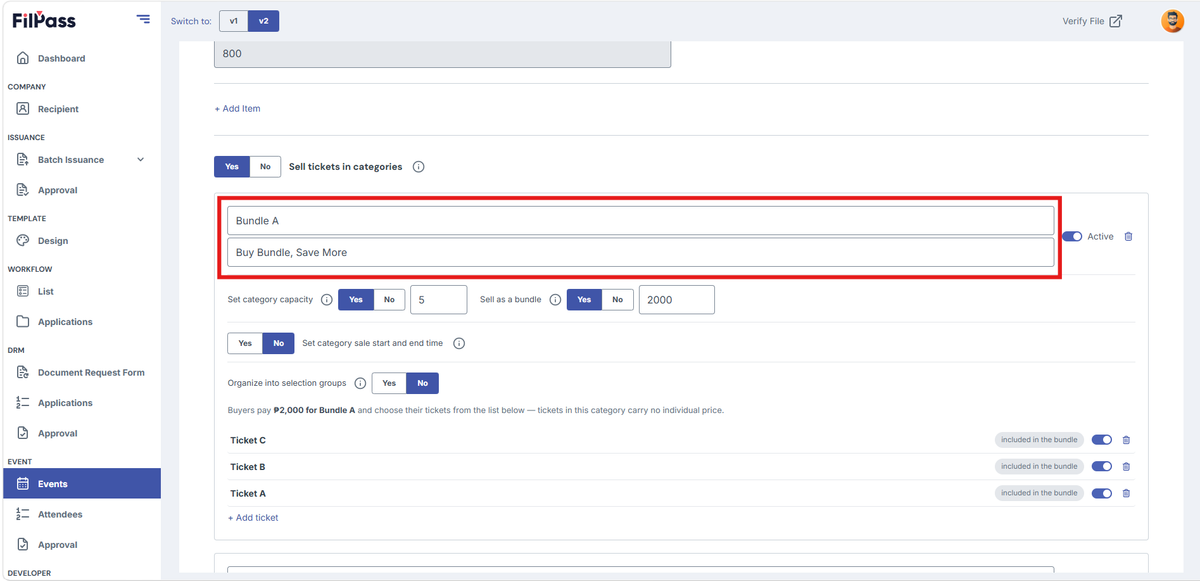
C. Activate or archive the category using the status toggle.
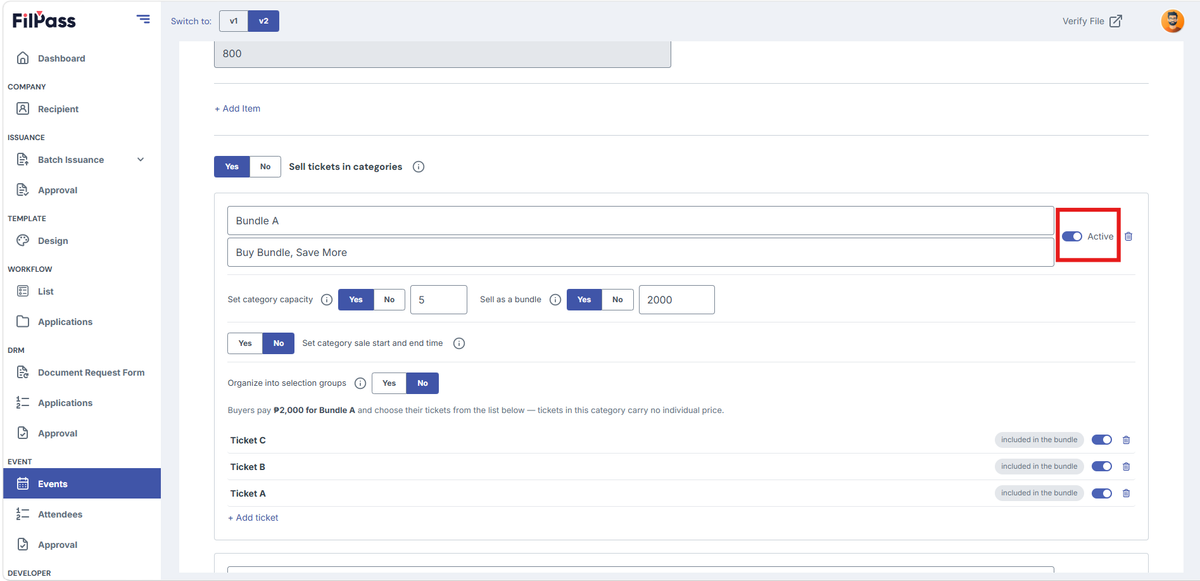
D. Delete the category if it is no longer needed.
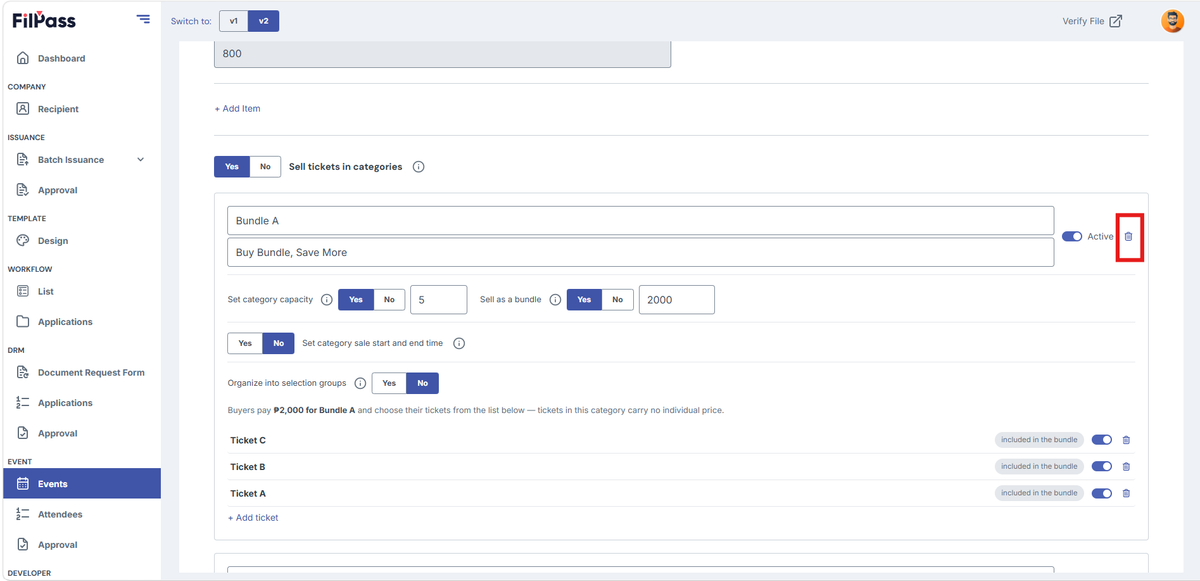
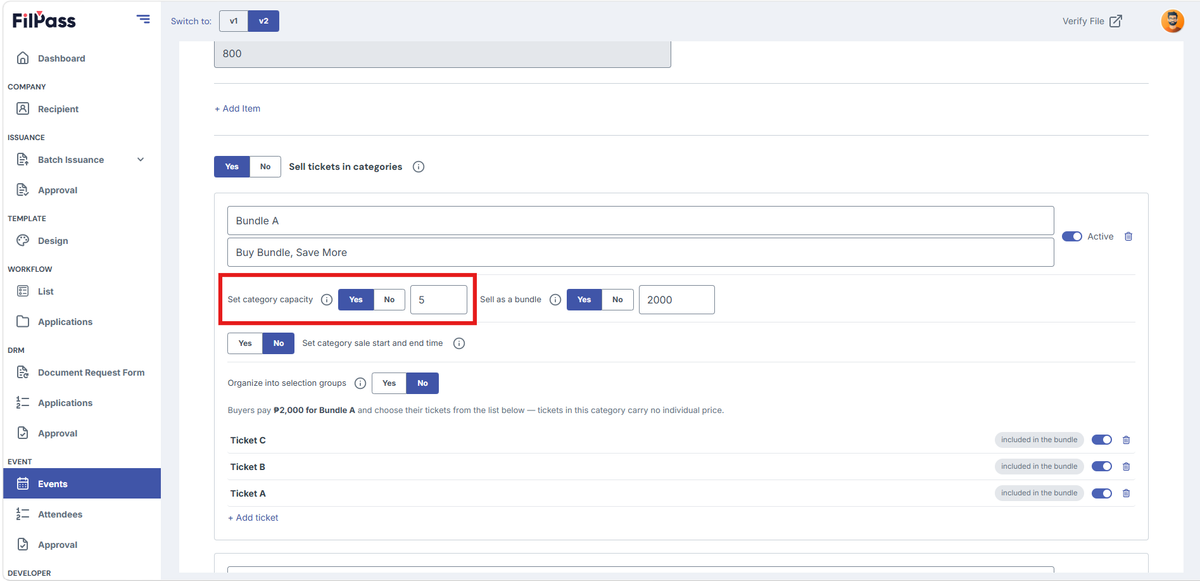
E. Set a Category Capacity to limit the number of bundles available. Leave the field blank if you do not want to set a limit.
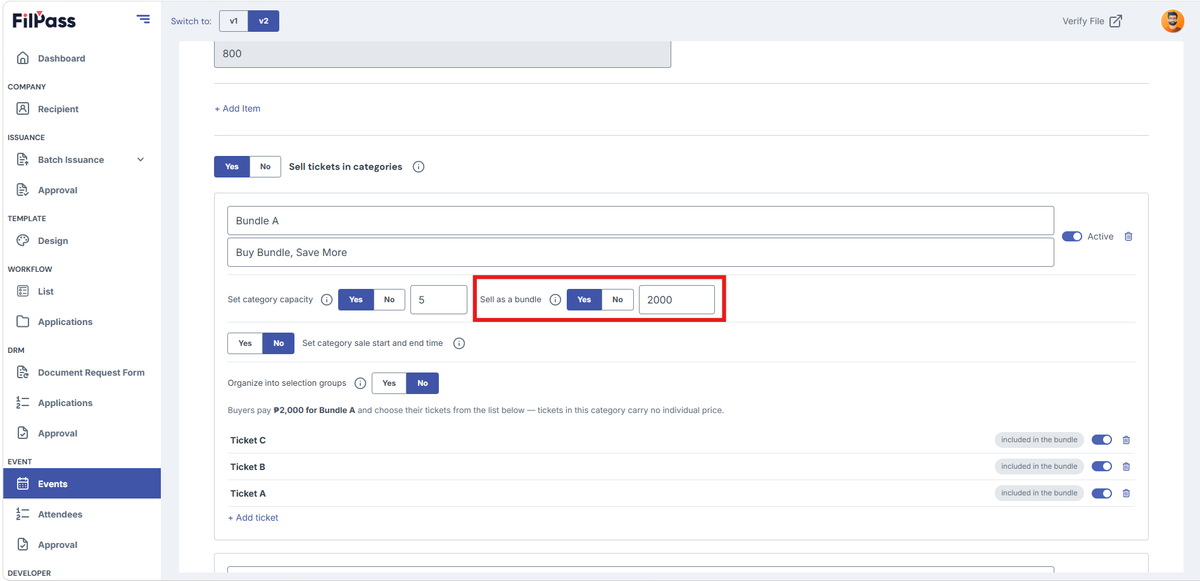
5. Enable Sell as a Bundle
Turn on the Sell as a Bundle toggle.
When enabled:
- All tickets within the category are sold together as a single package.
- Customers receive every ticket included in the bundle.
- The bundle is purchased using one price instead of separate ticket prices.
If this option is turned off, each ticket is sold individually even though they belong to the same category.
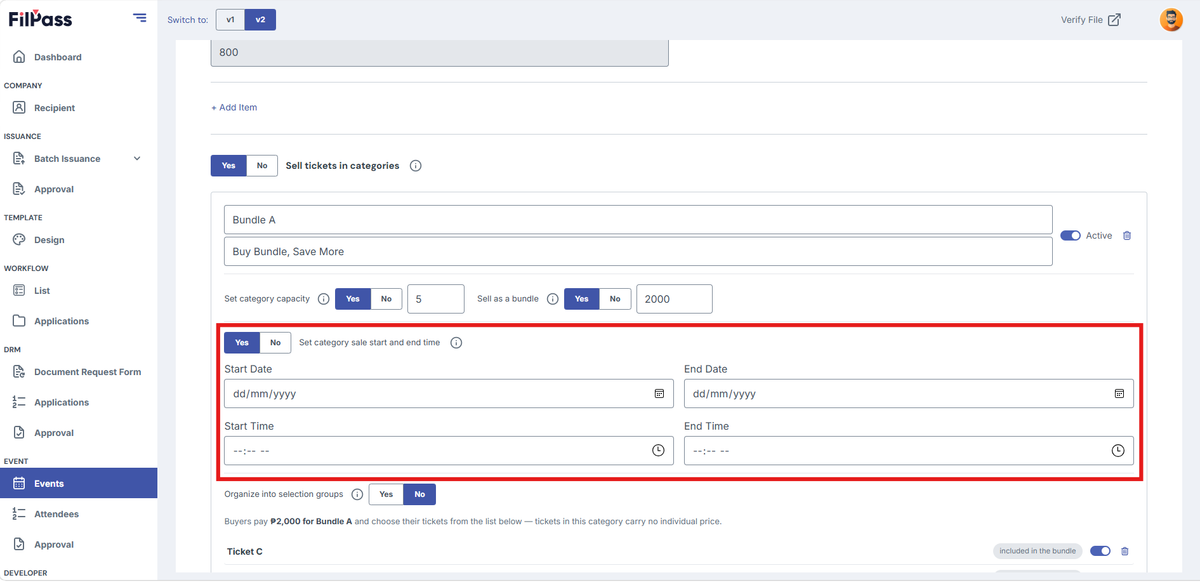
6. Set a Bundle Sale Period (Optional)
If the bundle should only be available during a specific period, enable Set Category Sale Start and End Time.
Specify the following:
- Start Date
- Start Time
- End Date
- End Time
If this option is disabled, the bundle follows the default event sale period.
7. Organize Tickets into Selection Groups (Optional)
Enable Organize into Selection Groups if you want to separate tickets into logical groups before adding them to the bundle.
Selection groups can be used to organize tickets by:
- Seating sections
- Event sessions
- Admission types
- Time slots
- Other ticket classifications
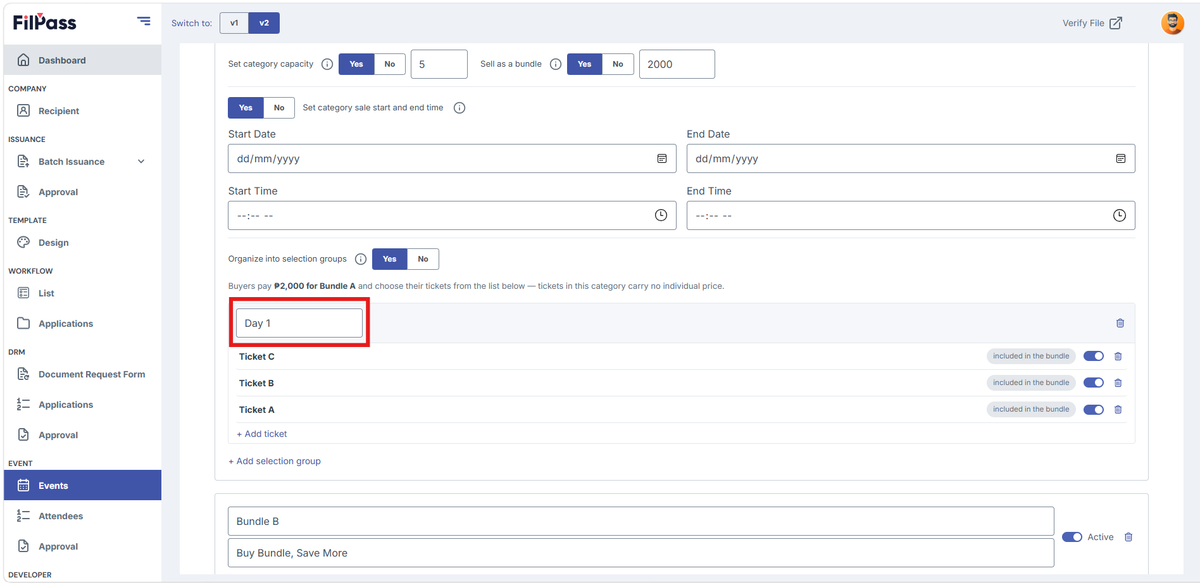
When enabled, you can:
A. Enter a Group Name.
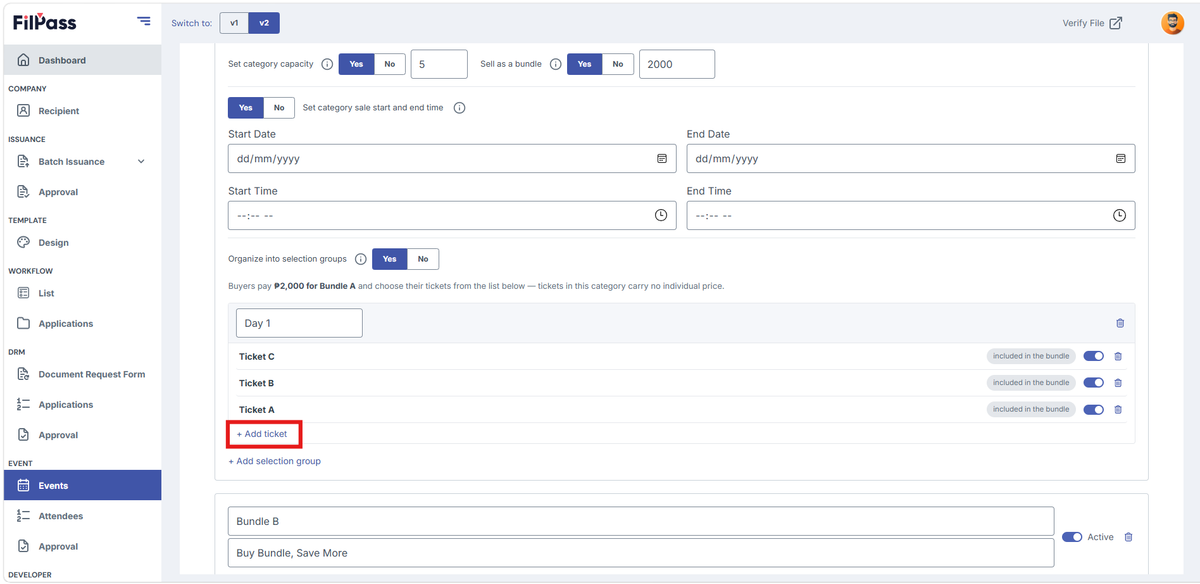
B. Add tickets to the group.
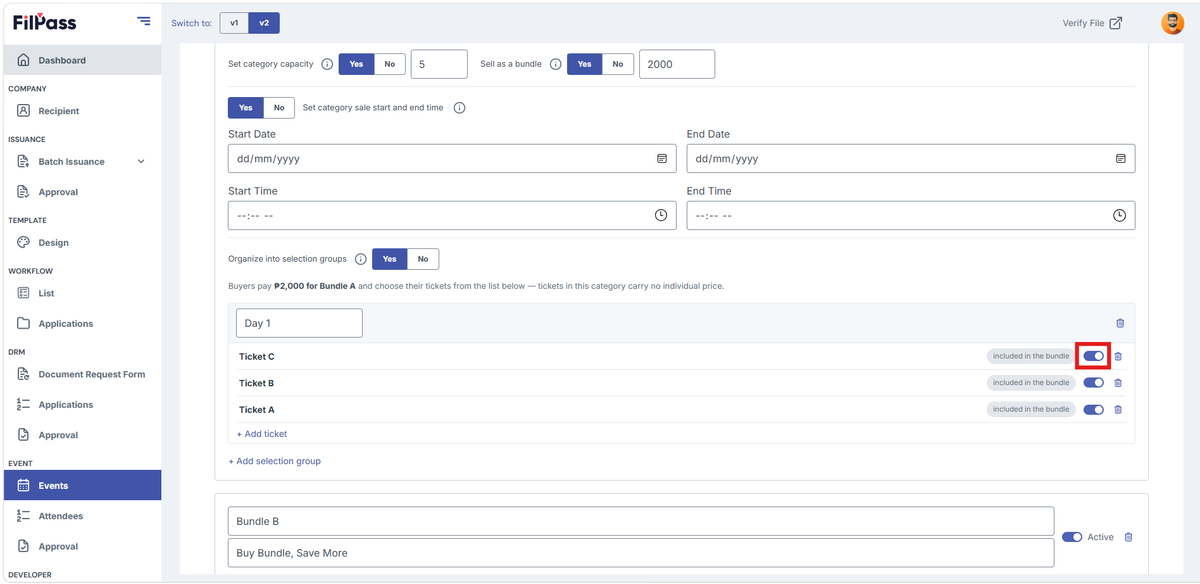
C. Activate or deactivate individual tickets.
D. Delete tickets from the group.
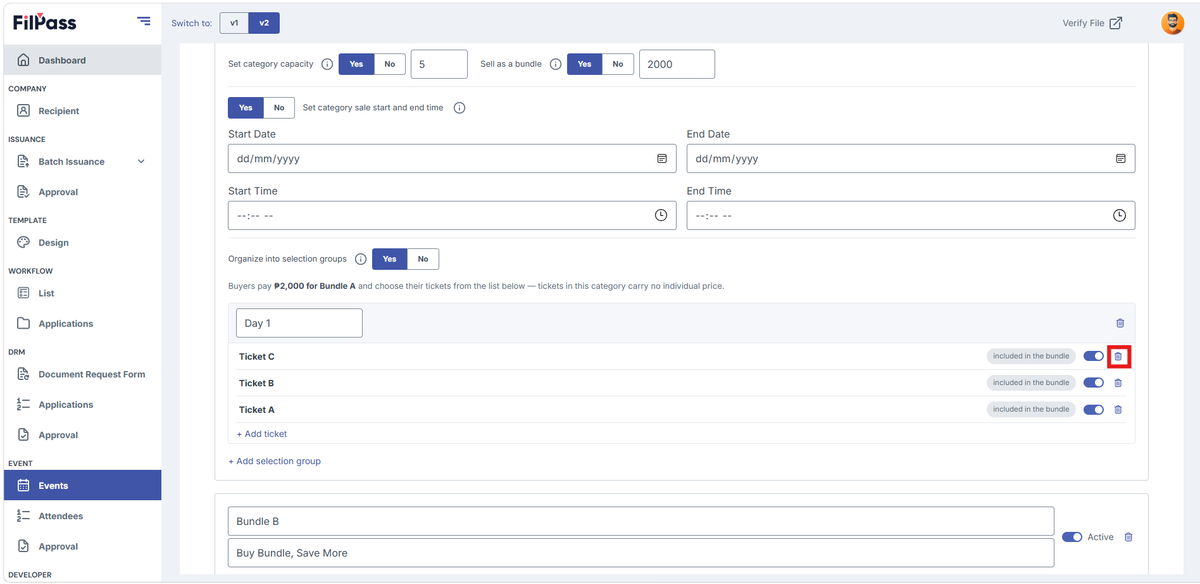
E. Delete the selection group.
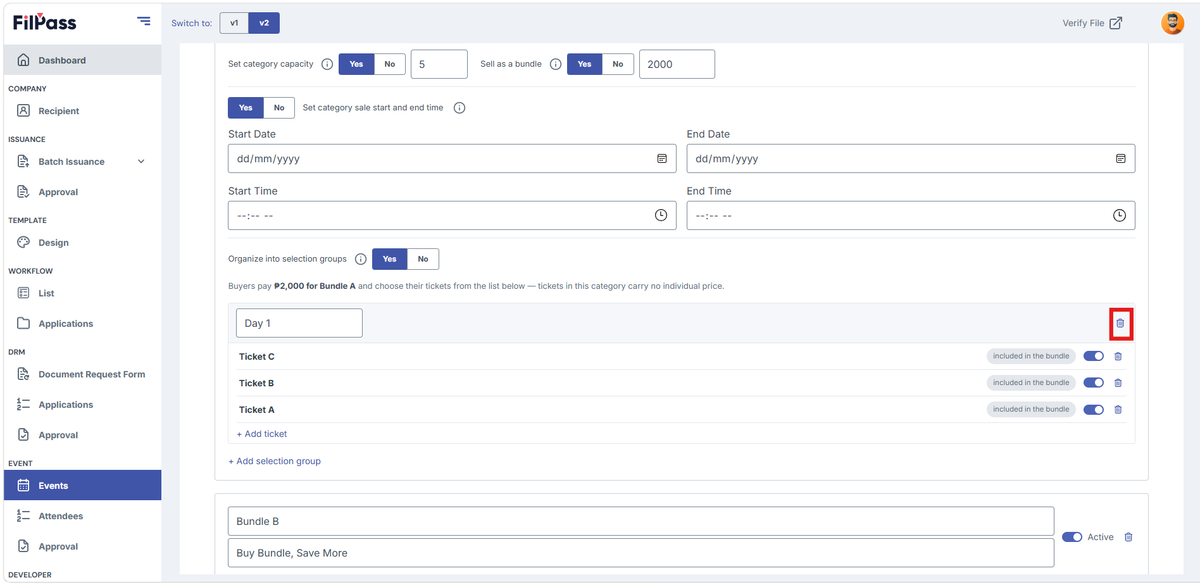
F. Create additional selection groups as needed.
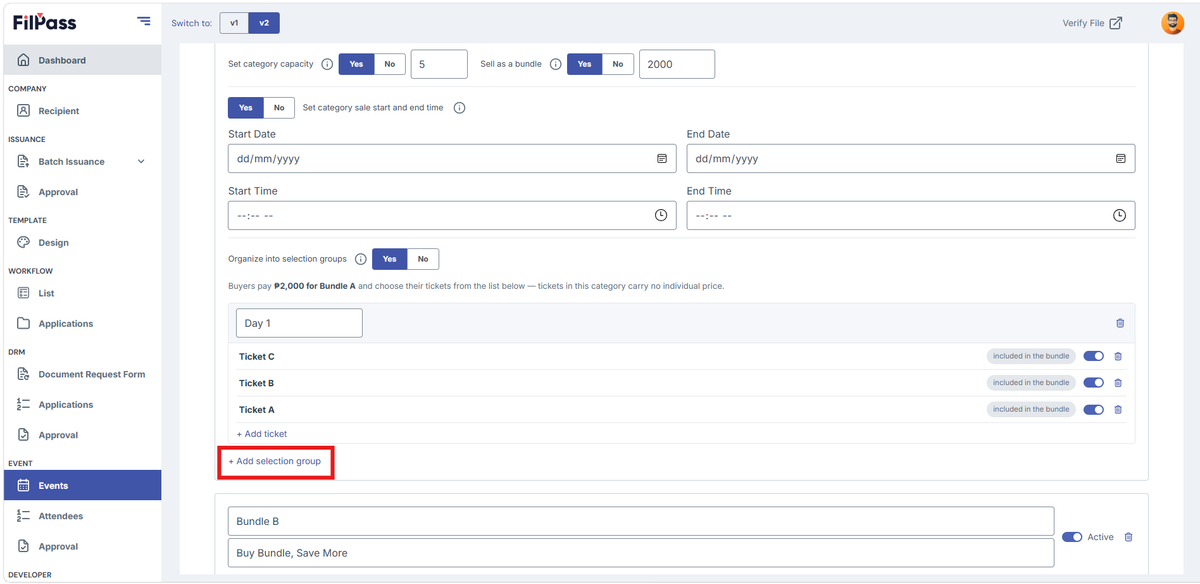
If this option is disabled, tickets can still be added directly to the category without grouping them.
8. Add Tickets to the Bundle
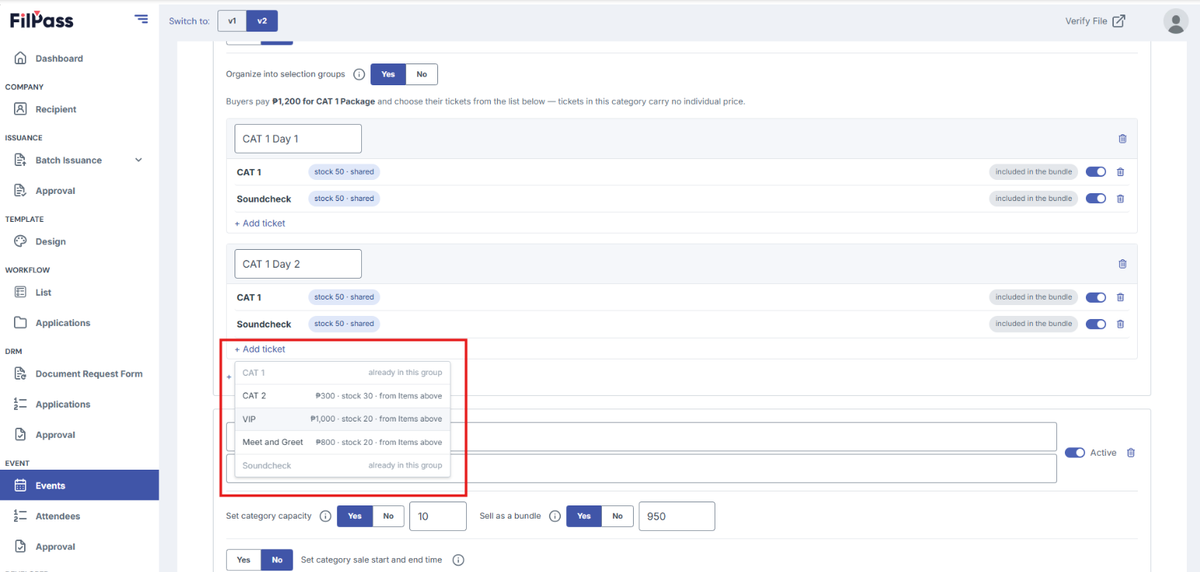
Within the category or selection group, click Add Ticket and select the tickets that will be included in the bundle.
Repeat this step until all desired tickets have been added.
9. Create Additional Bundles
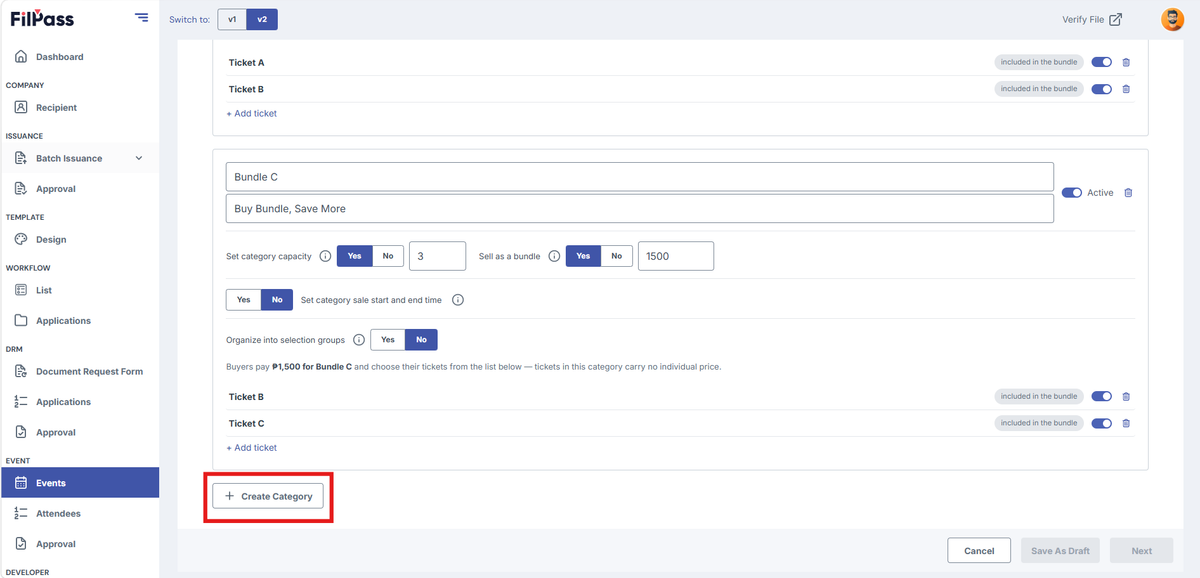
To create another bundle, click Create Category and repeat the configuration steps above.
Each category represents a separate bundle with its own pricing, capacity, sale period, and ticket composition.
Example
An event organizer wants to sell a VIP Package that includes:
- 1 VIP Admission Ticket
- 1 Meal Voucher
- 1 Event Merchandise Voucher
To configure this:
- Enable Sell Tickets in Categories.
- Create a category named VIP Package.
- Enable Sell as a Bundle.
- Add the Admission Ticket, Meal Voucher, and Merchandise Voucher to the category.
- Save the event.
Participants purchasing the VIP Package will receive all three items together as a single bundled purchase.