Add Field Section

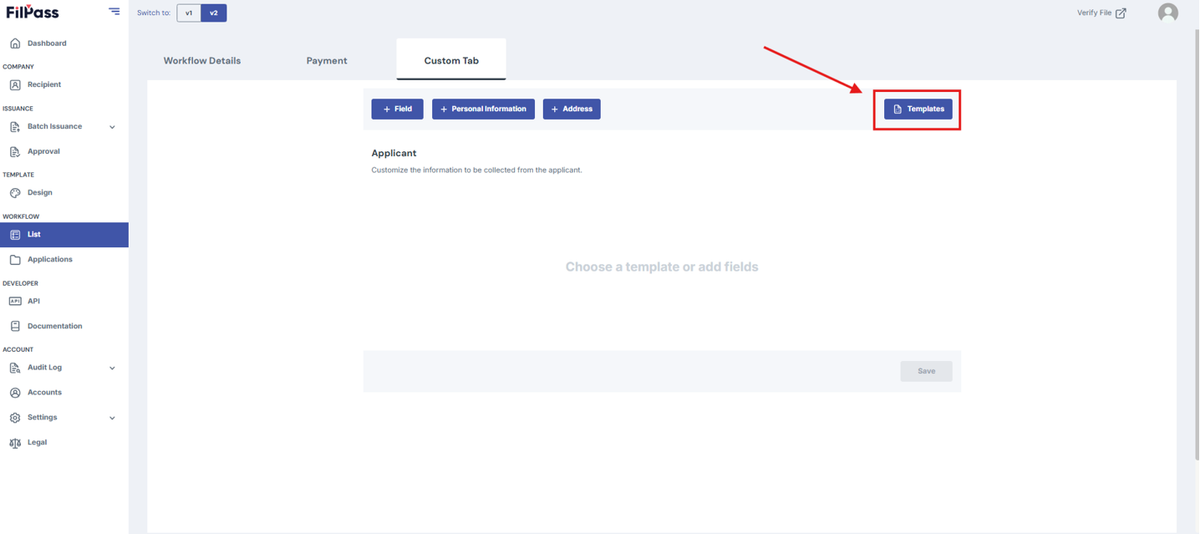
1. Click “Templates” on the top right corner to add premade fields.

  • Fields are used to collect information from recipients (e.g., Name, Age, Address).
Image of the Custom tab page with the Templates button highlighted in a red box

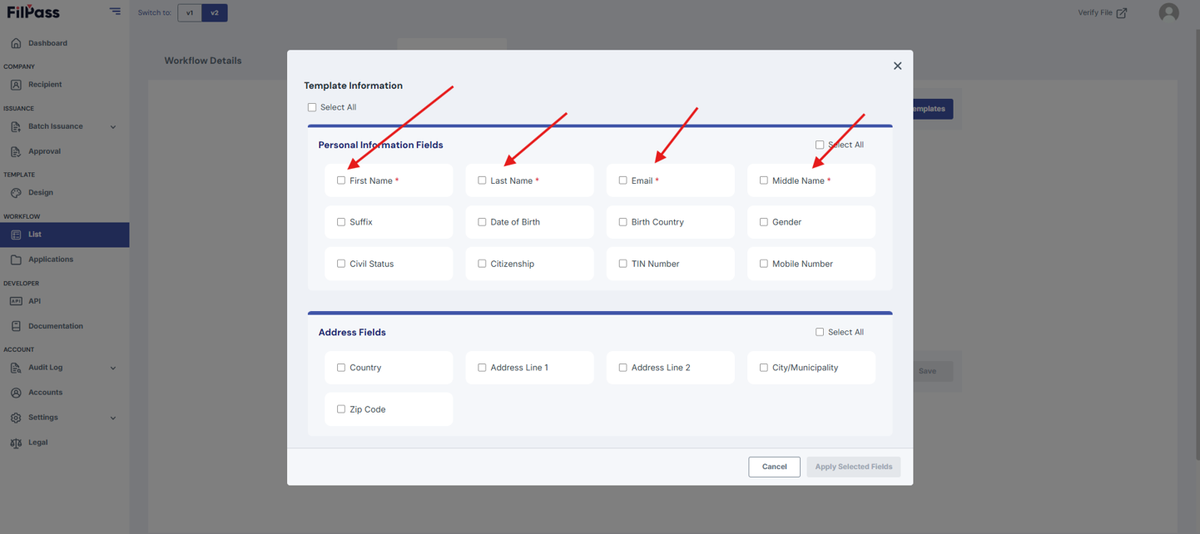
2. Check the checkboxes within the Templates modal to select the required fields.

Image of the Template Information modal with the required fields highlighted.

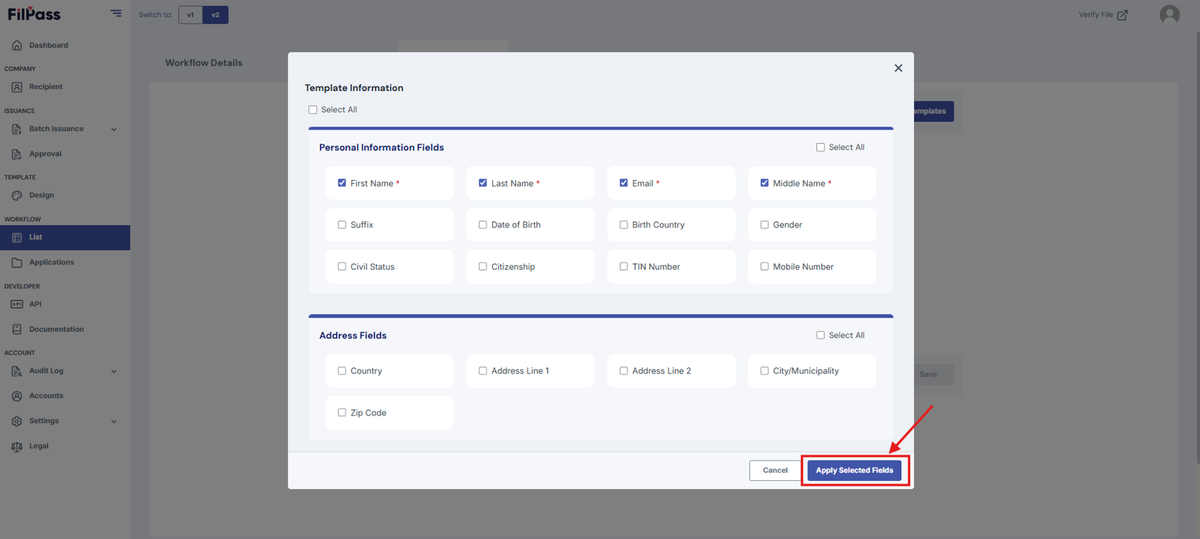
3. Click “Apply Selected Fields” after adding all necessary fields.

Image of the Template Information modal with the Apply Selected Fields button highlighted by a red box

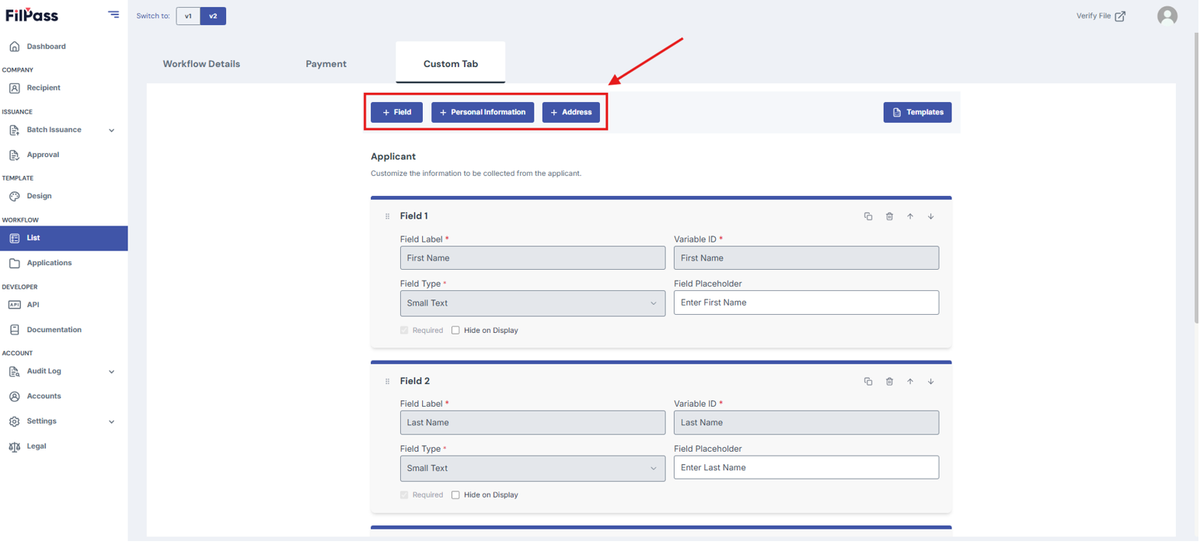
4. You may also use the other options on the top to add fields. (Field, Personal Information, and Address)

  • Field: Adds a custom field
  • Personal Information: Adds the first four fields in the Personal Information section of the Templates.
  • Address: Adds all fields in the Address section of the Templates.
Image of the Custom tab page with the buttons for Field, Personal Information and Address are highlighted in a red box

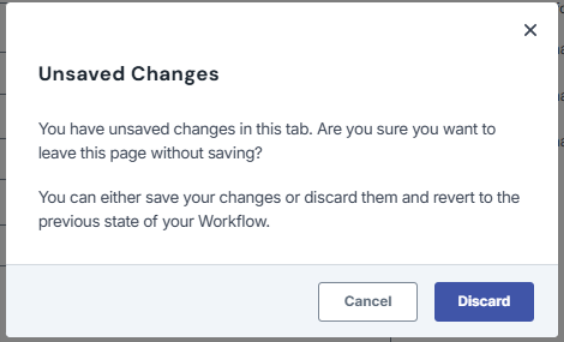
Note: If you exit the page or go to another page without saving, a discard modal will appear and ask for confirmation in leaving the page.

Image of the Discard modal

Related Articles

Issuing AuthorityProfile Settings

Access Level

This section explains the Access Level of your IA.

settings
28 Jan 202653 views
Issuing AuthorityAccount Settings

Admin Role

This section explains how you can add and remove an Admin role in the Accounts Section.

27 Jan 202633 views
Issuing AuthorityWorkflow

Approval Tab

This section explains the Approval Tab of a Workflow.

workflow
26 Jan 202617 views
Issuing AuthoritySuper Admin

Batch Issuance Domain

This section explains how to set up your Batch Issuance Domain.

settings
28 Jan 202615 views