

Workflow Issuance Tab
The Workflow Issuance Tab contains similar details as the Batch Issuance page except that Approval is located on separate tab.
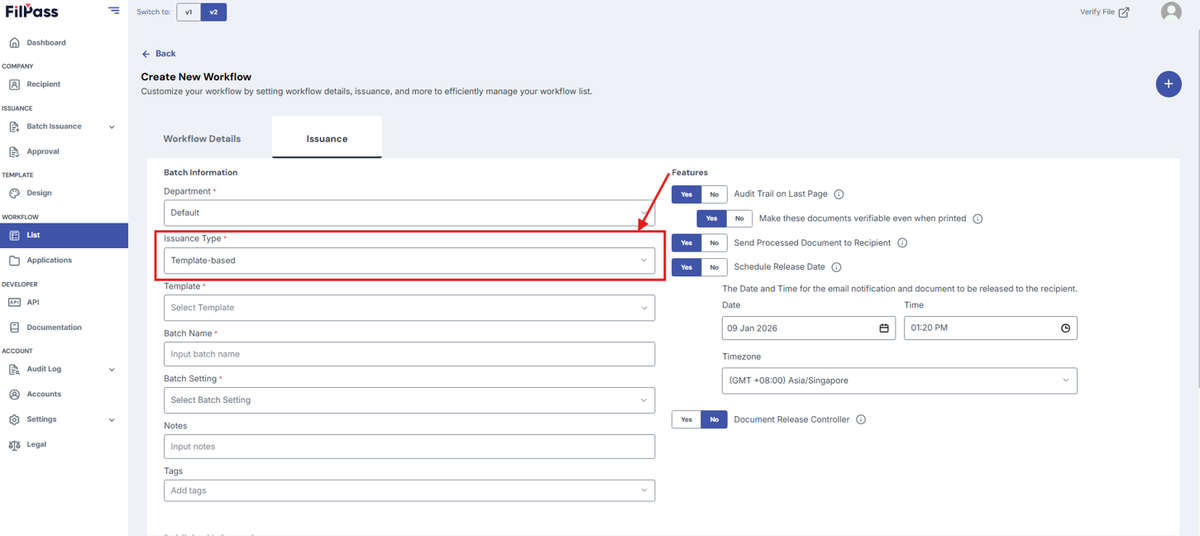
Note: You can only use Template-based as the Issuance type.
The new field is called Batch Setting. Batch Setting allows you to control how a batch is issued per application.
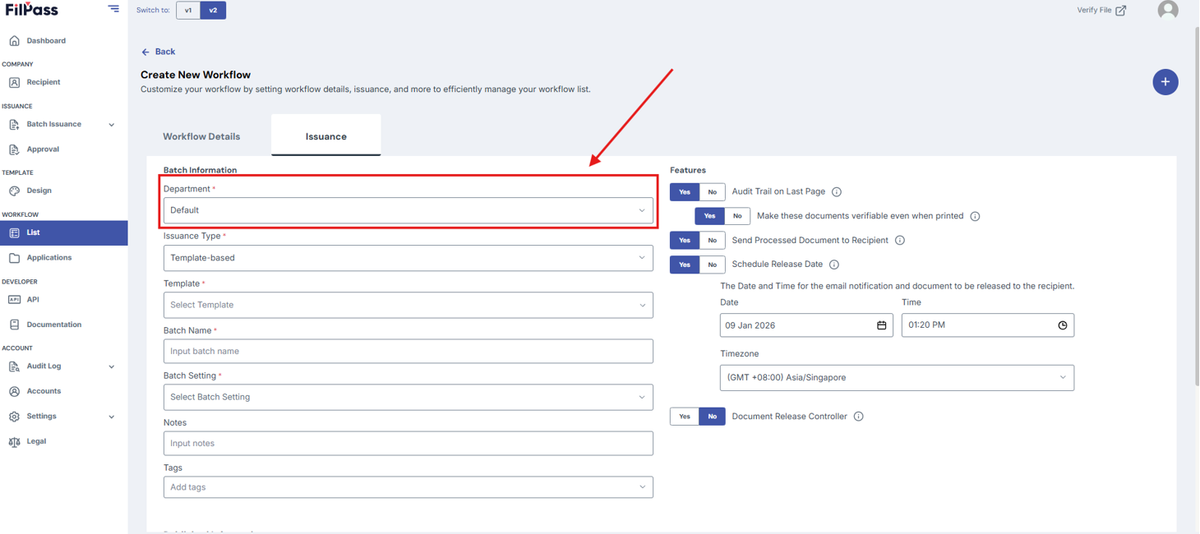
- Select a Department under the “Department” field.
- Choose an Issuance Type from the available options.
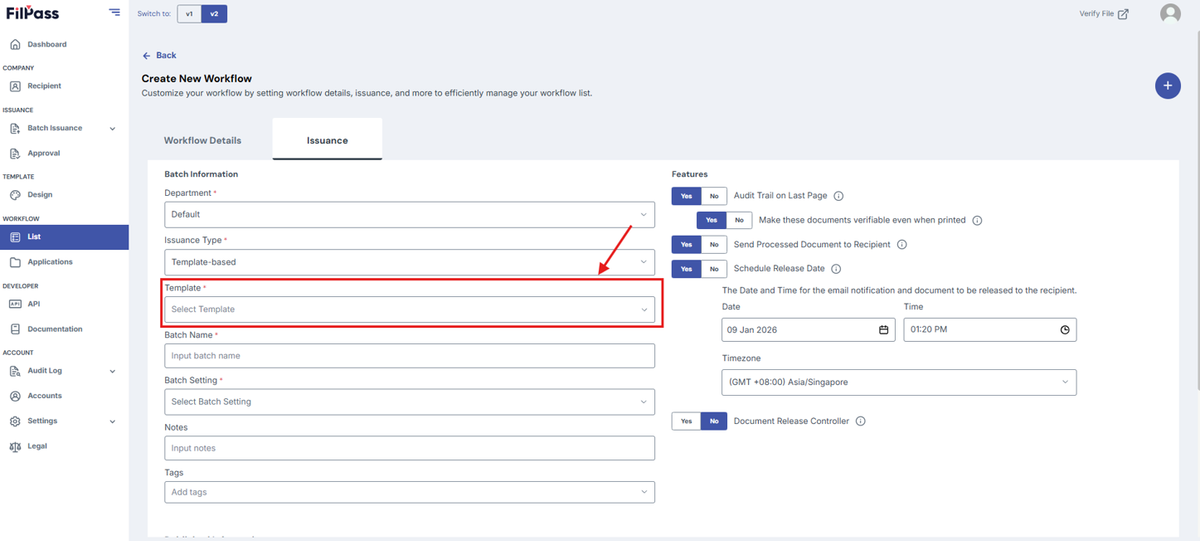
- Select a Template for the issuance.
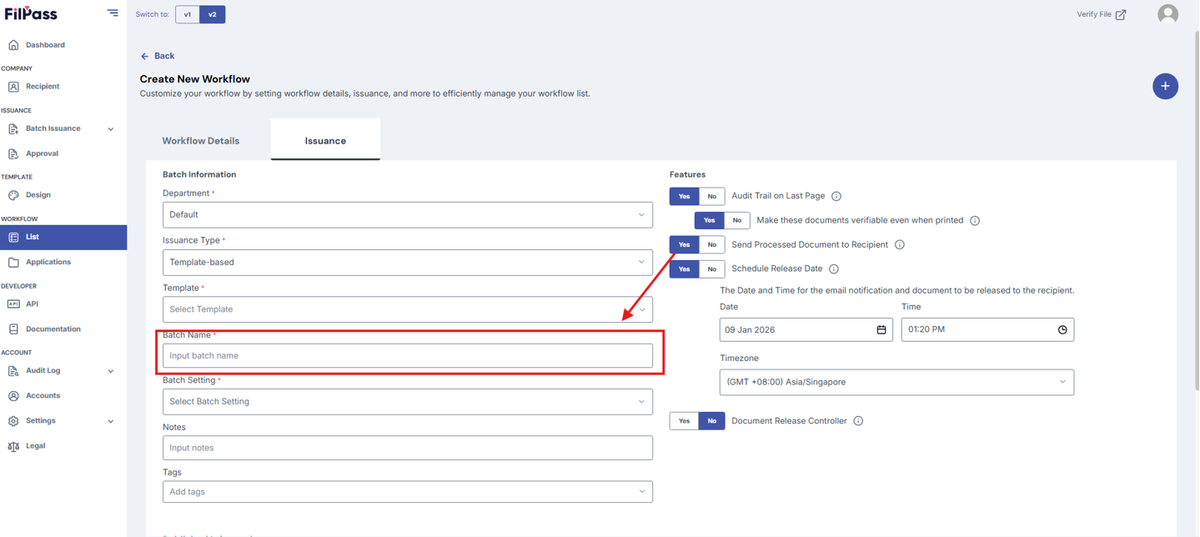
- Enter a Batch Name.
- Choose Batch Settings for processing. Batch Setting allows you to control how a batch is issued per application.
- Single Batch for all applications: All issuances for Workflow application are under one batch.
- New Batch per application: All issuances per Workflow application are in separate batches.
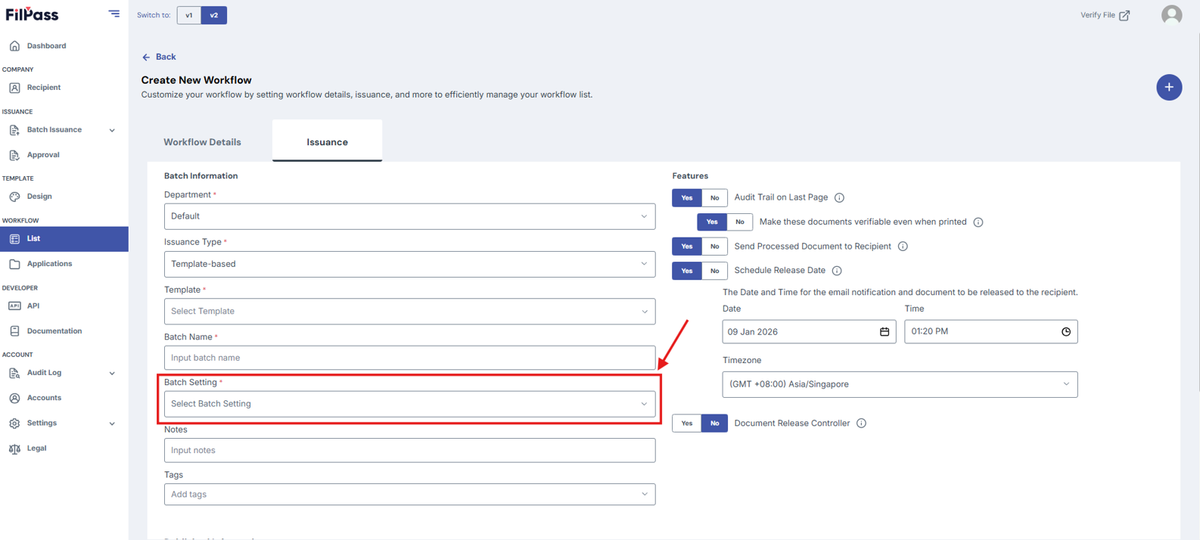
- Add Notes for the Batch Issuance of your Workflow.
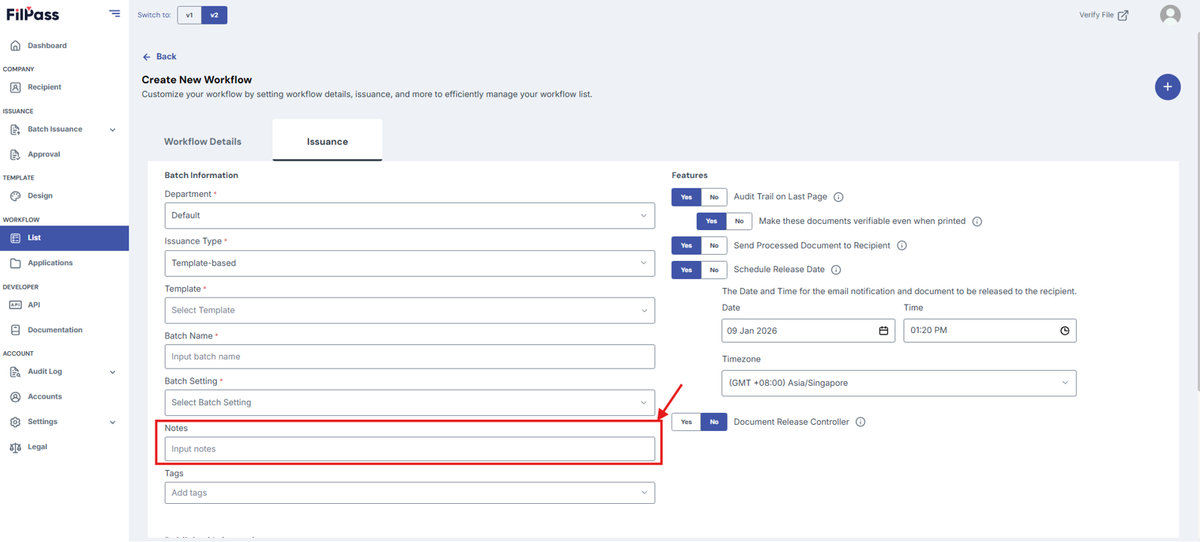
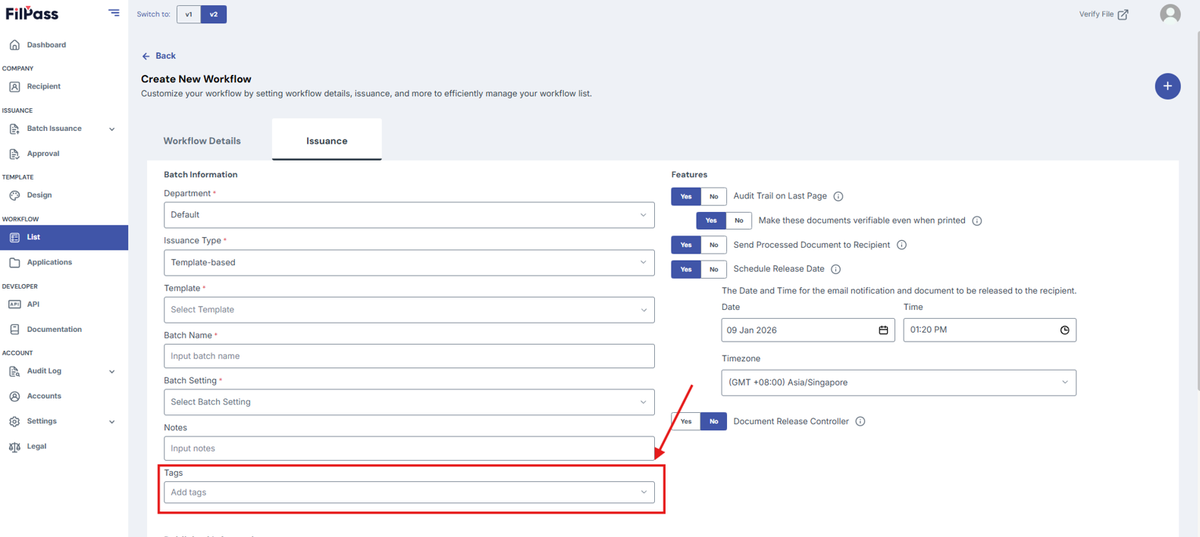
- Add Tags for the Batch Issuance of your Workflow.
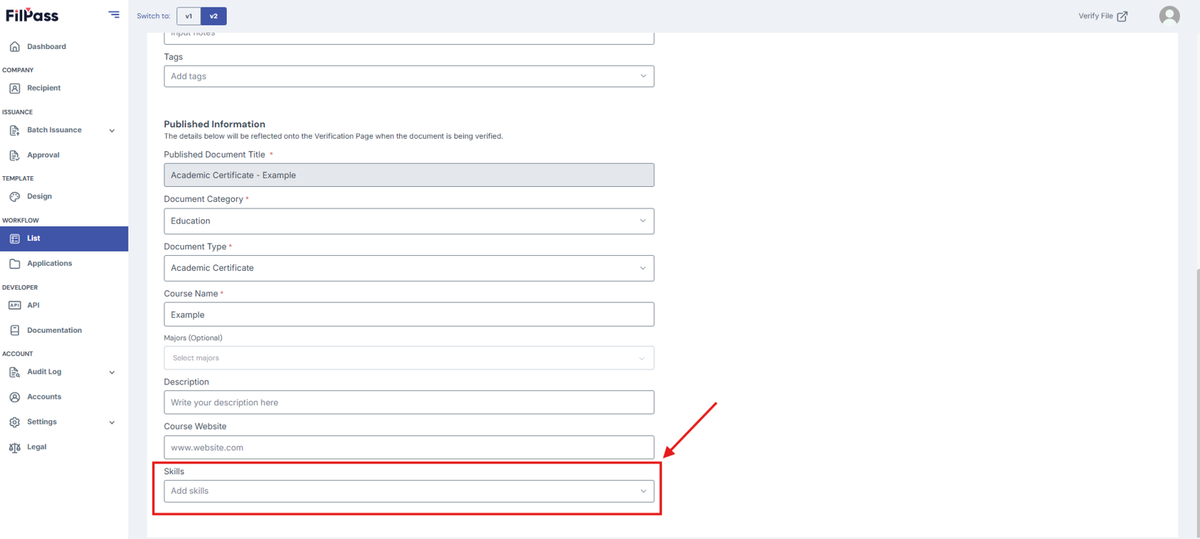
- Under “Document Category”, select the category which matches your Batch Issuance. This will show additional fields depending on the category you’ve selected.
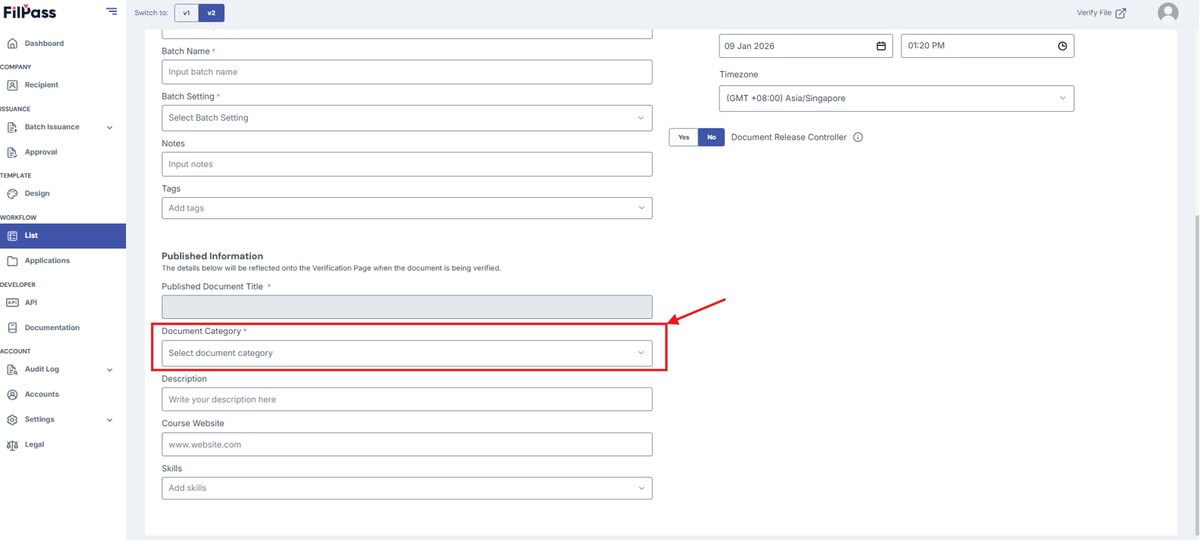
- Below are the additional fields that you would see depending on the Document Category selected:
- Education: Has an additional field for Document Type, Course Name and Majors (Optional).
- Microcredential: Has an additional field for Document Type and Course/Program Name.
- Digital Identity: Has an additional field for Document Type and Country.
- Human Resource: Has an additional field for Document Type and Document Title.
- Other: Has an additional field for Document Type and Document Title.
- For the additional fields that showed up after you’ve selected a Document Category, fill up all the required fields to complete your Document categorization.
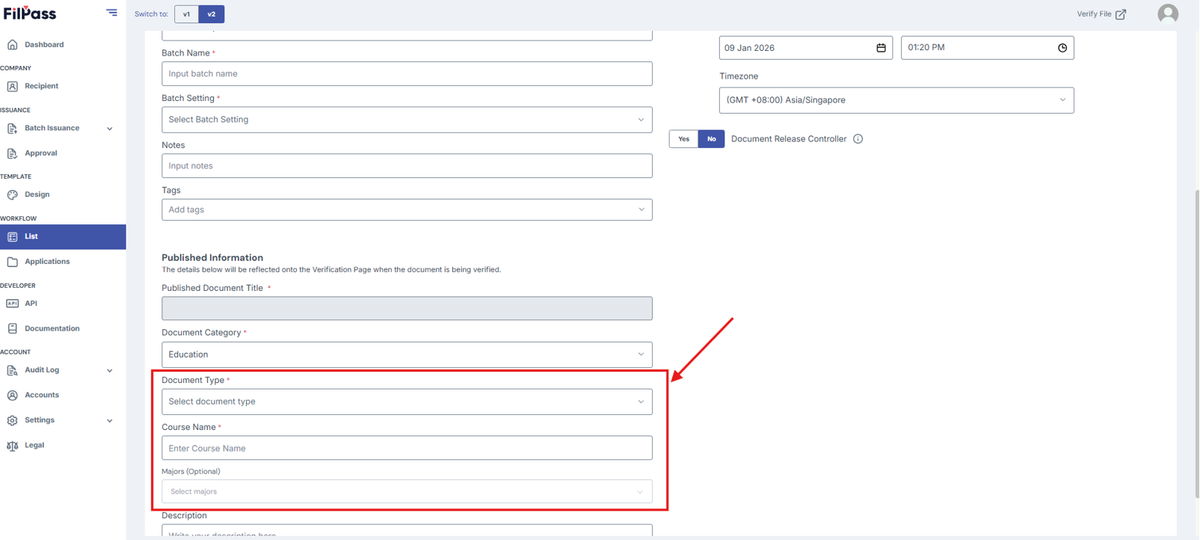
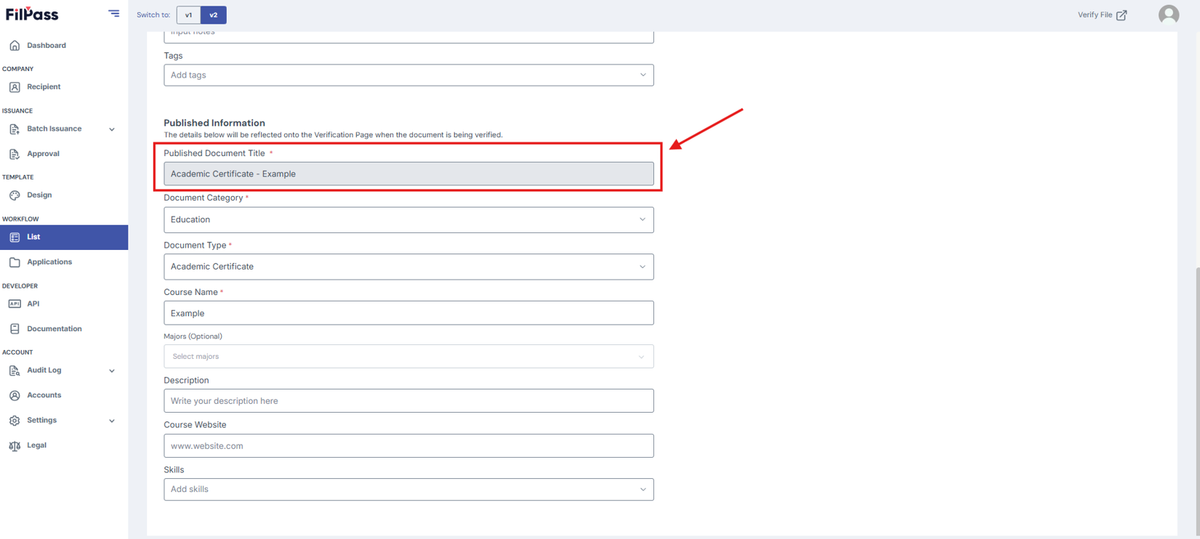
- These fields will be the basis for your Published Document Title.
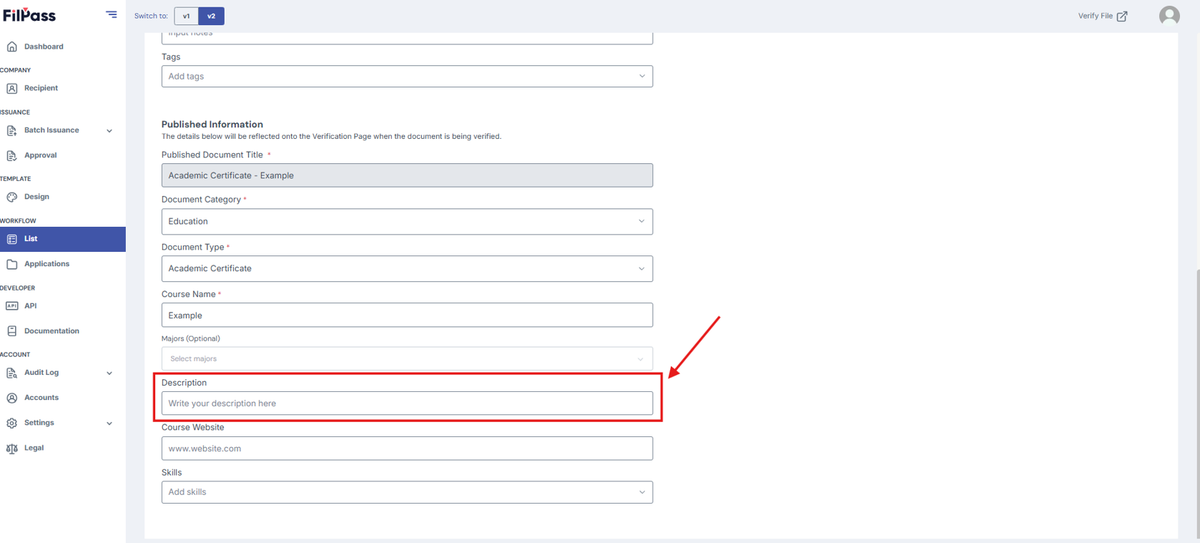
- Add a Description for the workflow.
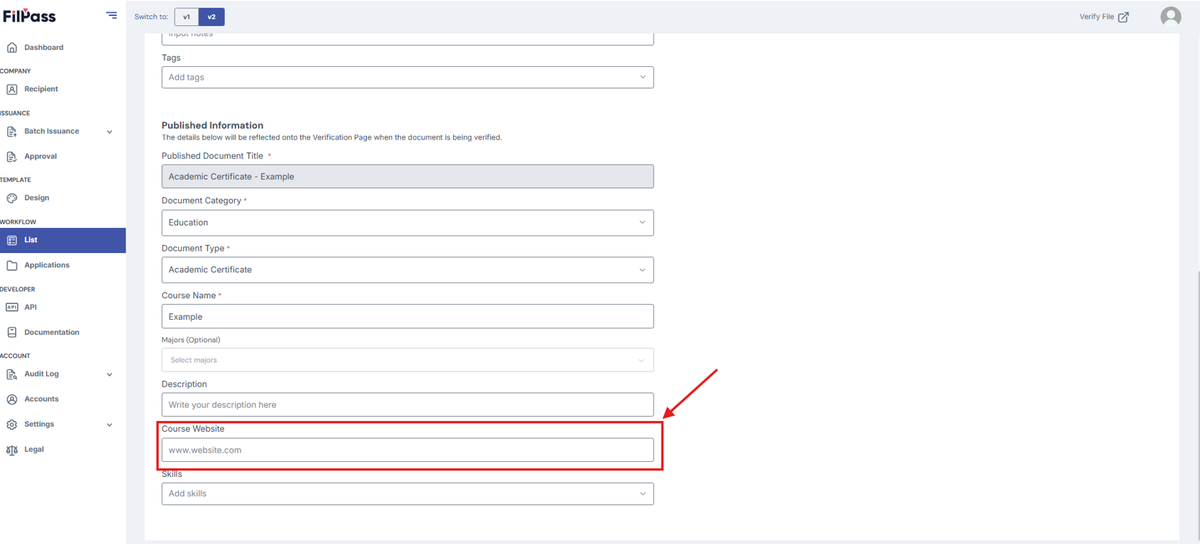
- IA can include their website under “Course Website.”
- Add Skills for the Batch Issuance of your Workflow
Workflow Features
There are five additional toggles under “Features”:
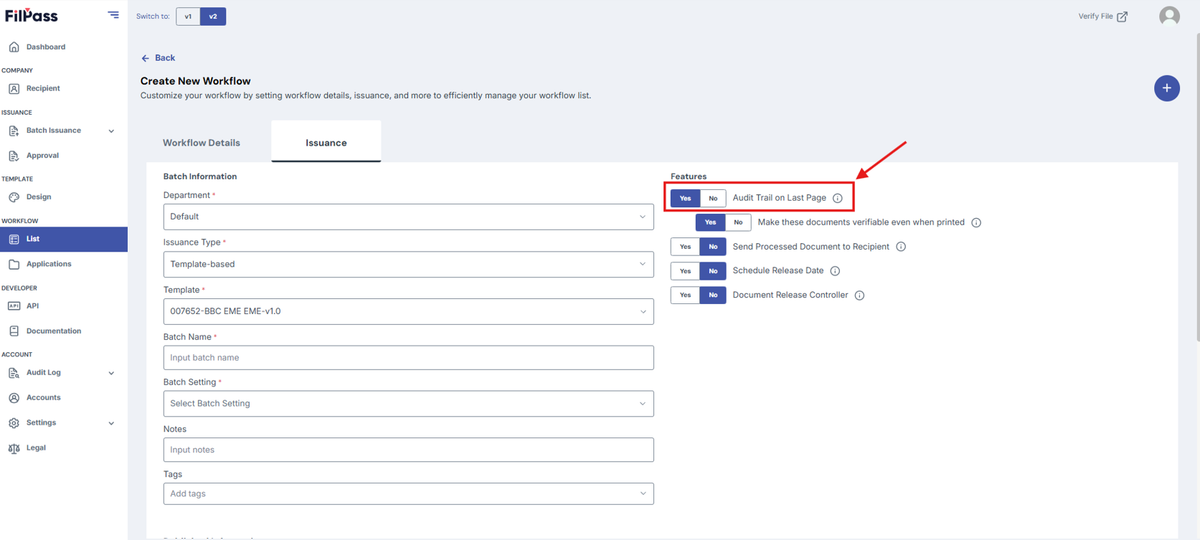
- Audit Trail on Last Page
- Yes – Adds a page showing the document's audit trail.
- No – No audit trail will be added, making Option II unavailable.
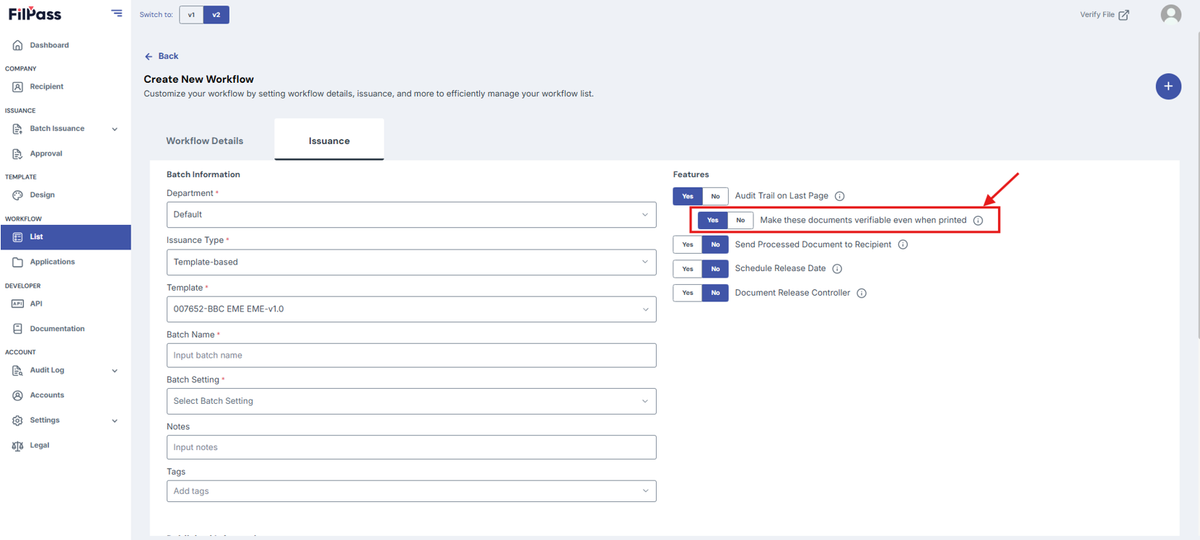
- Make This Document Verifiable Even When Printed
- Yes – A QR code will be included on the audit trail page for verification.
- No – The QR code will not be available.
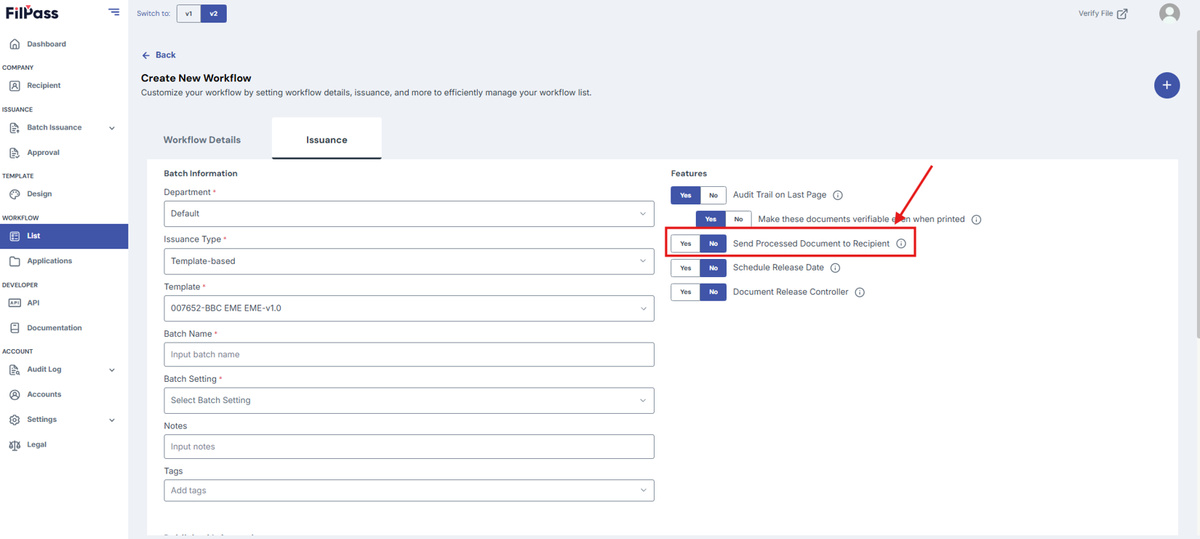
III. Send Processed Document to Recipient
- Yes – The recipient will receive an email with the document attached.
- No – The recipient will receive an email but without an attachment.
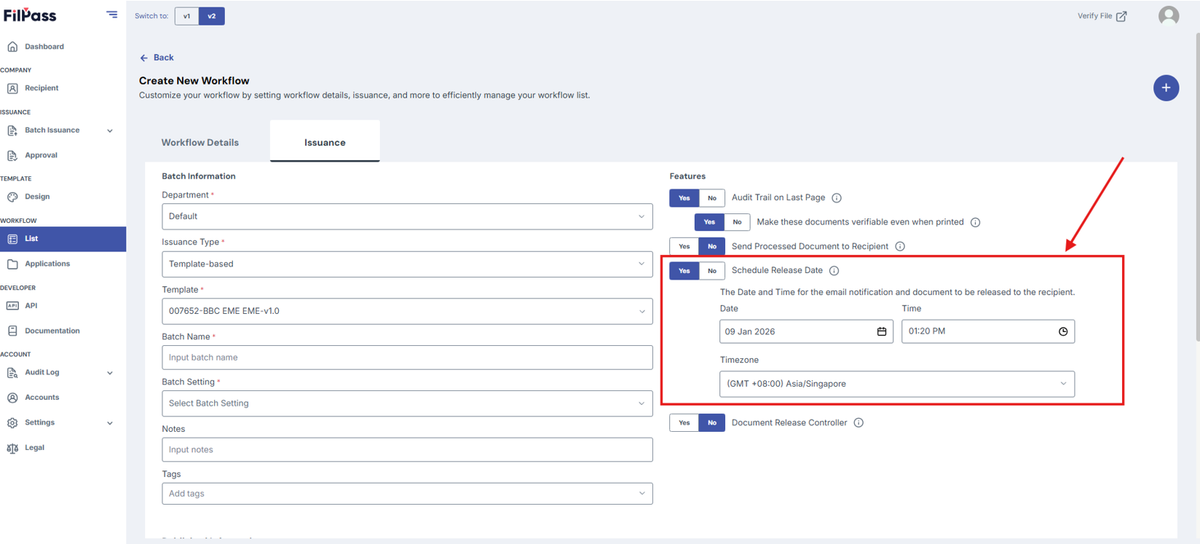
IV. Schedule Release Date
- Yes – The document will be sent to the recipient according to the set release date
- No – There will be no scheduled release date and will be sent to the recipient once approved by Approver or released by the Document Release Controller.
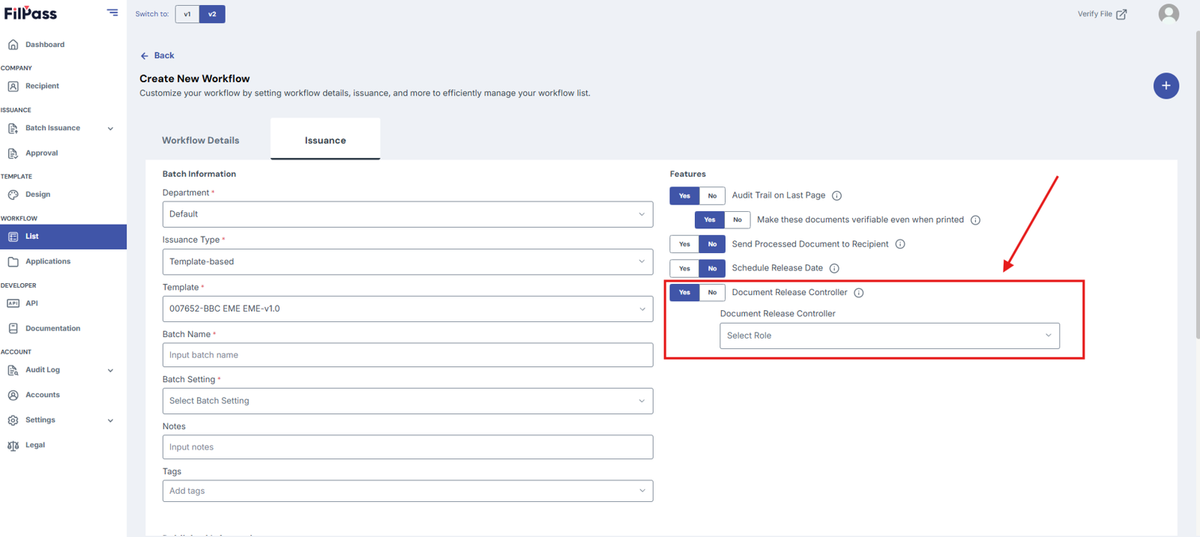
V. Document Release Controller
- Yes – The document will only be released if it is released by the selected Document Release Controller
- No – The document will no longer need the Document Release Controller to be released.
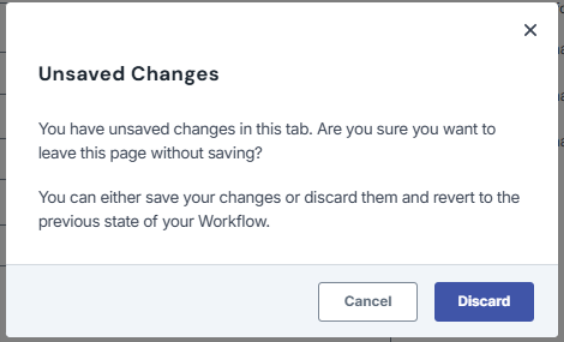
Note: If you exit the page or go to another page without saving, a discard modal will appear and ask for confirmation in leaving the page.
Was this helpful?